How to Sew a Patch – Scoot Stitches

Happy Friday, Lovely People! I’m bringing back our Scoot Stiches series today to show you how to sew a sew-on patch. BOCO Gear sent all their 2019 Ambassadors a sew-on patch, and I quickly realized not many folks know this easy-to-learn skill. The great thing about patches is that you can sew them on to just about anything, and today’s video tutorial will show you how in a snap! I’ll be sewing my patch onto my Skirt Sports Toasty Girl Vest (which I love).


Check out some of our other tutorials in this series; Make a Running Skirt with a Waist Band Pocket, and Make a Gear Bag from a Race T-Shirt

Scoot’s Most Popular Posts

Sometimes, it’s hard to believe Scoot A Doot has been going strong for six years. It’s fun to take a look back over all our posts and remember the race destination or recipe that inspired us to share a post with you. It’s also fun to take a look at the stats and see which ones are the most popular over time. Today, I thought I’d share a look at our most popular posts. The top five posts on our blog cover everything from food to costumes to inspiring a positive body image in our kids.

The Color Run vs. The Color Vibe

Far and away our most popular ever post is retired Chick Victoria’s comparison of the Color Run and the Color Vibe races. When theme races were in their heyday, everyone wanted to know which of these two packed the biggest colorful punch.  Vic dishes on her experiences at both, and reading this brought back memories of my own Color Run. We all need a little nostalgia sometimes.

Costume Tutorial – Running Skirt with Pocket Waistband

When Meridith and I ran the BOLDERBoulder together in 2015, we knew we needed special costumes befitting the 3rd largest road race in America. Going with the whole rock theme, we settled on Wilma and Betty from the Flintstones. I decided it was the perfect chance to try making a running skirt with a pocket, and an even better opportunity to document the whole process so you can make one, too.

Ready for a nap. And beer. Maybe beer, then nap.

Product Review: Buff Butter

Retired Chick Bec was a nut butter nut, and got everyone excited to try Buff Butter. The company is  now called Buff Bake, and Bec gushed over three of the four flavors she tried. To quote her, “If you haven’t heard of Buff Bake’s butters, it is a line of high quality nut butters with added whey protein. Depending on the flavor, you’ll also see things like hemp, chia and flax seeds and organic coconut palm sugar. And, it comes in awesome flavors like Snickerdoodle Almond Butter and Cinnamon Raisin Peanut Butter, just to name a couple.”


Road Tested: Sweaty Bands

once upon a time, Meridith had a MAJOR problem with headbands. Her thick goregous hair (trust me, I’ve braided it) could not be contained by just any headband. She gave Sweaty Bands a run way back in 2013 and she was a big fan. I later bought one at a RunDisney expo and loved mine, too.  Skeptical? See for yourself in Mer’s review!

The Most Important Thing About Me

One of my favorite posts is from retired Chick Cam, and some insight she gained into the mind of her then eight year old daughter. If you’re a parent, especially of girls, this post will speak to you. Even if you aren’t a mom, you’ll remember being easily manipulated by society’s expectations of what’s healthy and beautiful. It’s a reminder to jump off that bandwagon.

We are the champions!


With nearly one thousand posts on the site, there’s quite the archive to browse through. I hope you find a few more things that speak to you. Be well, friends!


Scoot Stitches Sewing Tutorial – Race Shirt to Gear Bag

ScootStitchesLogo2

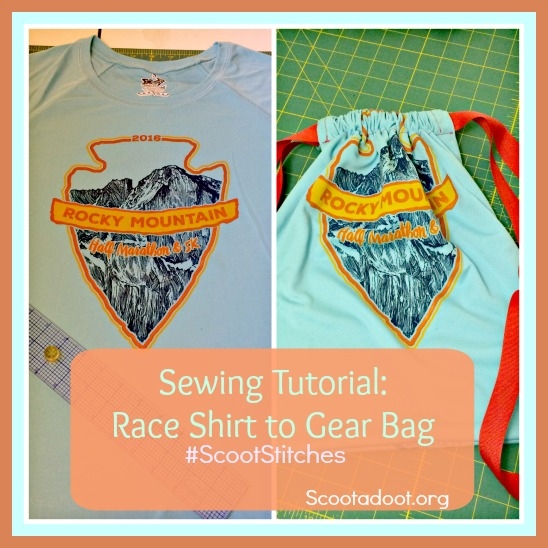
I’m guessing you have a TON of t-shirts laying around. As runners, we accumulate them like we accumulate safety pins. That’s why I thought a tutorial on how to make a gear bag out of a race shirt would be a great Scoot Stitches first project. When I floated the idea by Meri and our Facebook and Instagram friends, they all agreed! So here is a super simple project that is perfect for the first time sewist, and is even kid friendly (with supervision and help, of course). I’ll let you know when I think up some ingenious use for the safety pins beyond the norm. 😉

This project is easy, it took me an hour, and honestly, I didn’t really measure  or get too exact on this one. And that’s the point, don’t over think it. It’s just a bag, keep it fun and have fun with it. if you mess up, who cares? You’ve got plenty of shirts in the dresser, right?

scootstitcheslesson2

Supplies: Race shirt, 1 spool of thread (if it matches in color, great, if not, it’s cool), scissors or rotary cutter, straight edge/ruler, straight pins, fabric marker or chalk, 1 three yard spool of 1 1/2 inch wide ribbon, sewing machine, Stretch Sewing Machine Needles (see step 3).

Step 1 -Read these instructions all the way through before starting.

Step 2 – Cutting the Panels First, you’re going to cut your shirt to make the two panels for the bag. Here are two methods depending on the tools you have:

Scissors and Fabric Marker Method: Lay your shirt out flat making sure there are no wrinkles. Lay the ruler along one side, matching it to the seam and the top of the shoulder (see pics below). Draw a dotted line long the right side of the ruler. Using pins, pin the two layers together just inside the dotted line to keep them in place. Repeat this on the other side seam, the top just below the collar, and the bottom.  Next, cut along the dotted lines. After you have your rectangle shape, take out the pins along the top, but leave the rest in.

step1

Rotary Cutter Method: Line up your ruler as shown above, and cut along outside edge. Once cut, pin.step1aWhen you’re done, it should look like the photo below; all squared up and ready to stitch! **Note if working with a larger sized shirt, you may want to trim the sides and bottom to make a more narrow rectangle. DO NOT trim from the top, you need that extra fabric for a later step.

step1b

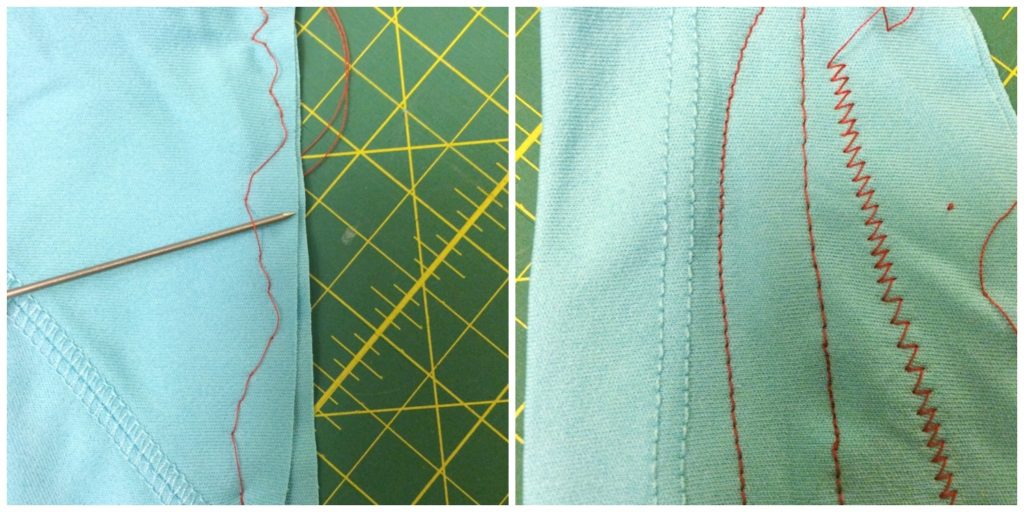
Step 3 – Practice Stretch Stitching Make sure you are using a stretch sewing machine needle for this project, and adjust your machine to stretch stitch settings (refer to your manual, or use a zig-zag stitch if you don’t have a stretch feature). Using some scraps that you cut from your shirt, stitch some practice seams to make sure your needle is catching the bobbin thread and sewing properly. With the practice swatch on the left, I used the #75 stretch needles, and my machine was skipping stitches. After I switched to the #90, I got the results I wanted. The right needles make ALL the difference.

stitches

needles

Helpful Info!

Step 4 – French Seam A French seam will keep the fabric from unraveling on the inside of your bag.  With the wrong sides together, start stitching 3 and 1/2 inches from the top and stitch the sides and bottom with a  1/2 inch seam allowance (I use the edge of my foot for a guide).

step2

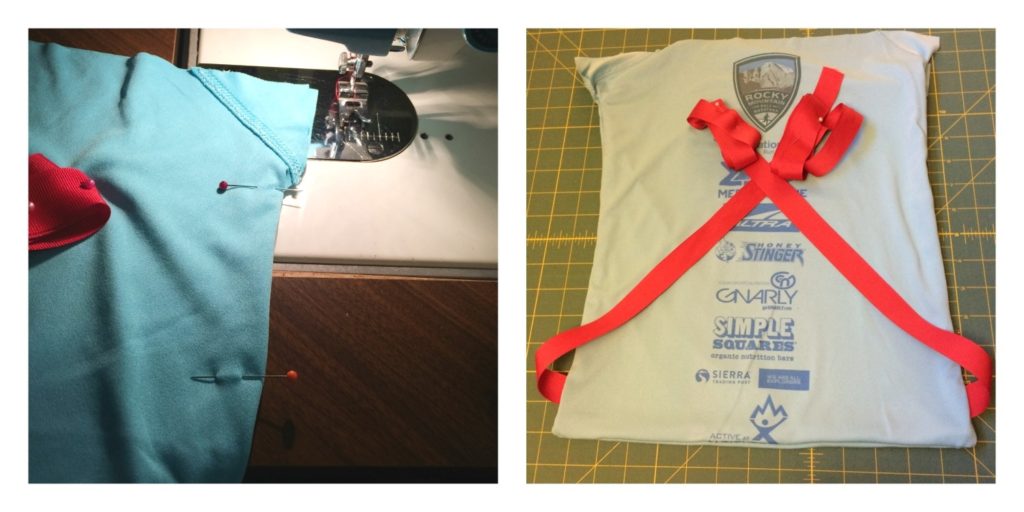
Trim off the corners and excess fabric. You should now have something that looks like a pillowcase. On the back panel, measure 2 1/2 inches from the bottom and mark that spot with a marker or a straight pin. Next, take your ribbon and cut 2, three-ish foot lengths (this is where I kinda eyeballed it). Match one end of each ribbon at an angle to the marks on each side and pin in place. I looped and pined the extra ribbon to the center just to keep it out of the way. Trim the ribbon so its edge lines up with the bag (I didn’t snap a photo of that, but you get the idea).

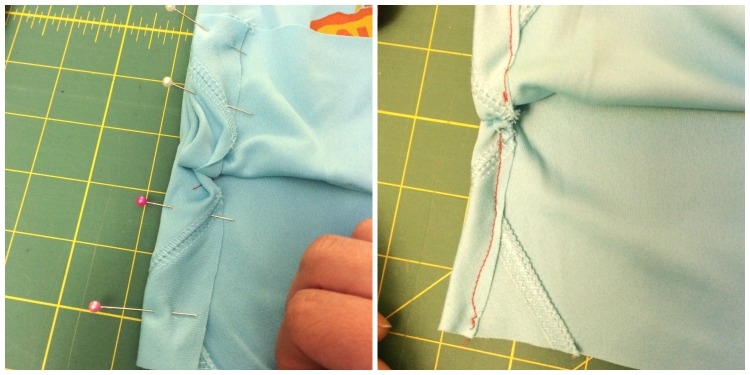
strapsNext, turn it inside out so that the shirt graphics are on the inside,and stitch the sides and bottom again just like before, only this time, do a 5/8 inch seam allowance. Stop stitching 3 and 1/2 inches from the top. When you turn it right side out, it should look like the photo below.straps3

You are almost done, can you believe it!?!? It’s starting to look like a bag, so pour some wine to celebrate your accomplishment! YOU ARE EPIC.

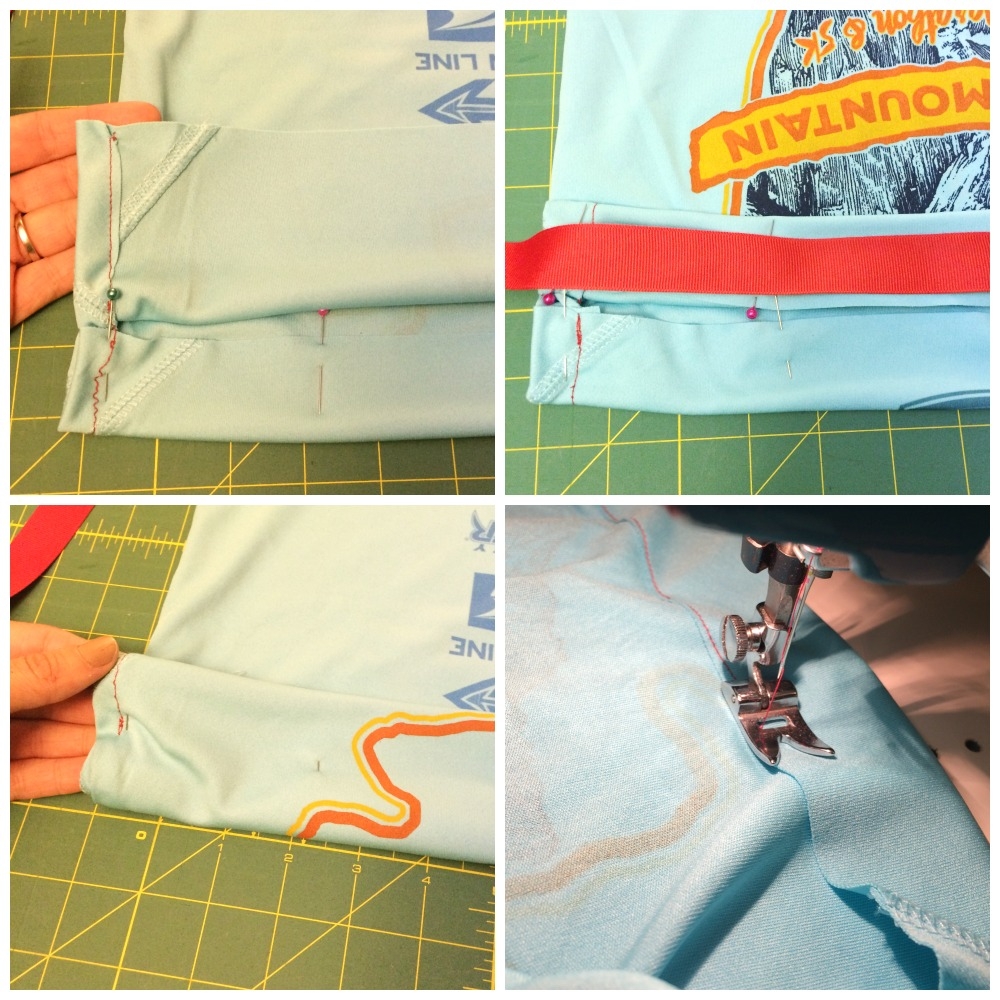
Step 5 – Make the “Casings” The casing is that part at the top where your ribbon is going to go through. Turn it right side out so the graphics are on the outside. Fold the raw edges over once, pin and stitch each flap. Repeat on other side.

casing1

Then, using the ribbon as a guide, fold over the flap and pin, making sure it’s wide enough for the ribbon. Stitch as shown (note, you’re NOT sewing the ribbon in, you’re just making a pocket for the ribbon).

straps2

Step 6 – Thread the Ribbon  Starting on the right side, fold the ribbon over once and pin a safety pin through both layers. The larger the safety pin, the larger the better, but even a bib safety pin will work. (Yay, we used them!) Feed the ribbon through the casing from the back to the front. Repeat on the other side feeding the ribbon from front to back.

ribbon

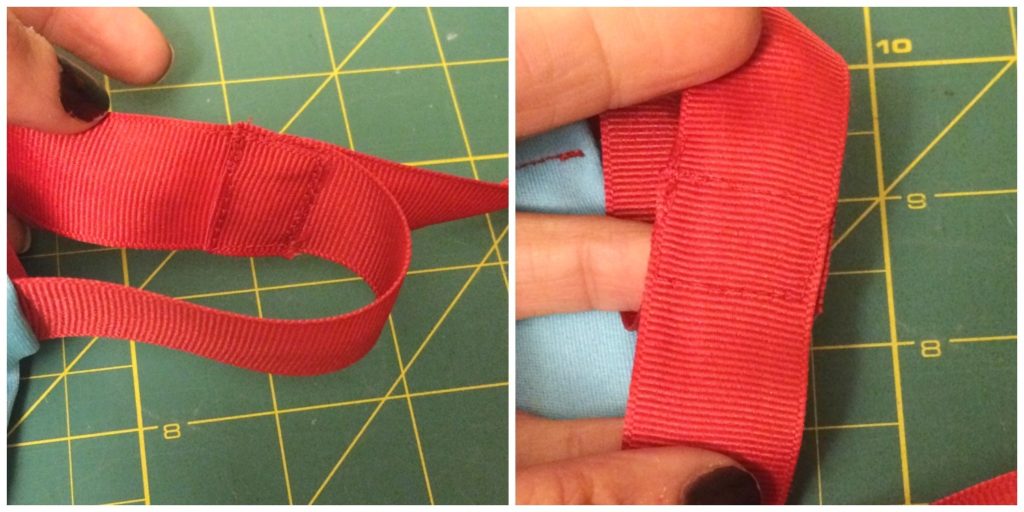
The last thing to do is to trim off the extra ribbon, fold over the cut edge, and stitch the loose ends as shown below.

secureribbon

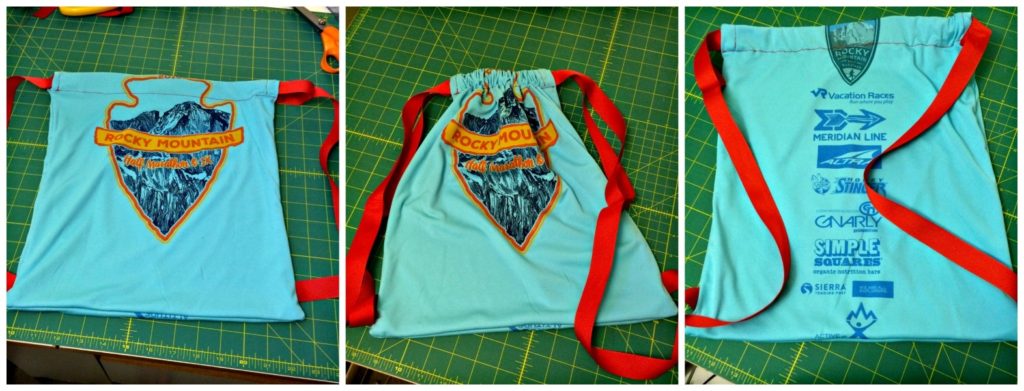
And you are finished already!

all-done

Outcomes: You just learned three major sewing techniques!!

Drawstring bag construction: If you skip the step of sewing the ribbon to the bottom of this bag, then you’d have yo’self the basis for a laundry bag, make-up bag, evening bag, a washing bag for unmentionables, or whatever else you can put in a bag.

Casings are used in all kinds of applications from elastic waistbands to roman shades. Chances are excellent you’ll use this again.

Lastly, the advanced couture French seam. LOOK AT YOU GO. They are handy when you don’t have a serger machine (visit www.stitchandsew.net/best-sewing-machine for more details), but are working with a fabric that will fray, causng your seams to come apart. That’s why we used it here. It encases the raw edges of the fabric to prevent unraveling at the seams. French seams are also handy if you need to alter the size of a garment. That’s why you usually only see a French seam in wedding gowns.

So that’s it for this lesson. I hope you enjoyed this easy project. Share your finished bags with me on social media, I’d love to see them! Tag your pics with #scootstitches.  If you have questions about the tutorial, you can email me at scootadoot@gmail.com.

Get out there and get crafty!

Save

Save

Save

Save

Save

Save

Save

Save

Save

Announcing Scoot Stitches Sewing School

We are super-duper qua-triple excited to announce a brand new feature on the blog!

ScootStitchesLogo2

That’s right! Next month, we’re launching an ongoing series of sewing tutorials with a focus on equipment, basic sewing skills/techniques, and making running costumes.  Some installments will be in video, some will be text posts with photos, some may even end up on Periscope!

The best part is we REALLY want to hear from you! Have you seen costumes on Facebook and wished you could be that crafty? Did you inherit a sewing machine and wish you could use it but don’t know where to start? We can help! Tweet, Facebook, or Instagram your questions and requests with hashtag #ScootStitches and we’ll cover it for you in the series.

It doesn’t matter if you’ve never sewn a button or if you’ve made your own tent (kidding, only my amazing mom has done that), you’ll learn something from us Chicks. We’ve got over sixty years of combined needle-wielding experience here.

I promise you that you can make anything you’ve seen us make on this blog. We’ll teach you how. You CAN do it!

The first lesson will post 5/11 and cover sewing machine info like what all the knobs and settings do, basic care and feeding, and how to thread the darn thing.

In the meantime, check out our past tutorial on how to make a running skirt with a waistband pocket.

Don’t be shy, send us your questions and requests on Facebook, Twitter, and Instagram using #ScootStitches. We love emails and comments in our posts (below), too!

Show ‘Em Your Rack, A Tutorial

A while back, I posted about my plan to make a medal rack and share it with you, and this weekend, the planets finally aligned to allow me the time to get my craft on. Of course, there are a few things that always make DIY projects better.

Things like a snowy morning.

snow

And Colin Firth as Mr. Darcy.

It is a truth universally acknowledged that Colin Firth IS Mr. Darcy.

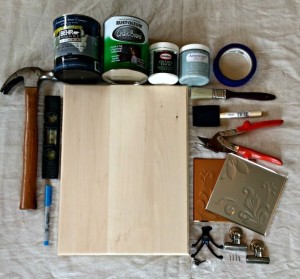
So, now that we’re all in agreement on that, let’s proceed, shall we? Here’s what you’ll need for this project:

supplies

Supplies:                                                                                                                                                                                   

Wood plaque of your choice                                            Chalkboard Paint                                                        Magnetic Clips

Primer                                                                                       2 Coat Hooks                                                                 Aluminum or Tin Strip

Paint Tinted color of your Choice                                Picture Frame Hook and Nails

Tools:________________________________________________________________________

Hammer                                                                                  Ruler                                                                              Level

Pencil                                                                                       Marker                                                                           Sandpaper or Sanding Block

Drill  or Screwdrivers                                                       Painter’s Tape                                                             Bristle Paintbrush

Foam Tip Paint Brush                                                      Fine Tipped Paint Brush for Touching Up

______________________________________________________________________________________

Step 1: Using a fine grit sandpaper or sanding block, lightly sand any rough areas on your wood piece. Pay attention to edges and corner in particular.

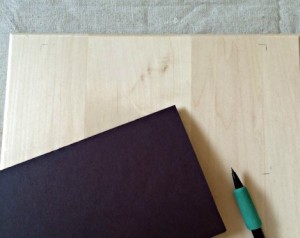
Step 2: Using a piece of paper, make a template for your chalkboard area to help you decide where you want it on your plaque. Once you have decided on placement, mark the corners with a pencil.

Step 2

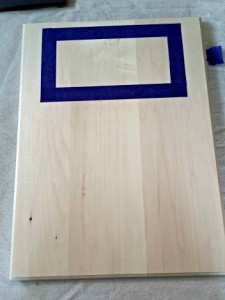
Step 3: Using a ruler and pencil, outline the desired area. Make sure your lines are straight and centered. Tape off the inside of your area with painters tape. Later you will paint the inside of your rectangle with chalkboard paint.

step3

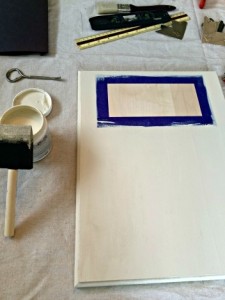
Step 4: Paint your plaque with primer. Be careful not to get any in the taped off area. Let dry.

step4

Step 5: Paint over the primer with your tinted paint. Let dry.

step5

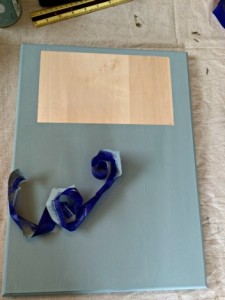
Step 6: Paint a second coat of your colored paint. Once it’s dry, remove the painter’s tape.

step6

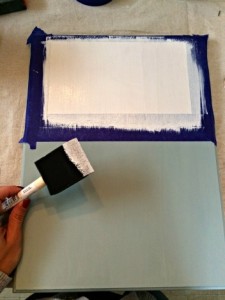
Step 7: Tape off the painted area around your chalkboard area. Paint the bare wood with two coats of primer. Allow each coat to dry thoroughly, and sand lightly between coats. This will help ensure a smoother writing surface once the chalkboard paint is applied.

step7b

Step 8: Apply two coats or chalkboard paint, allowing each coat to dry completely between coats.

chalk1

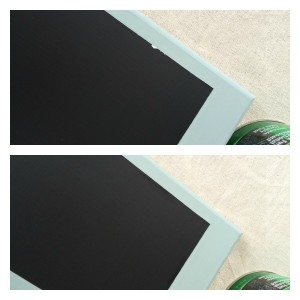
Step 9: After the chalkboard paint is dry, remove the tape. Touch up any areas with a small tipped paint brush if needed.

chalktouchup3

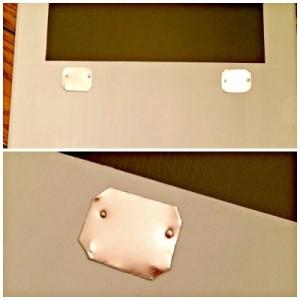
Step 10: Affix the tin strip (or pieces, as the case may be). Decide where you want your bibs to hang, and using a pencil, outline the strip. Nail in place. I had some tin tiles laying around my house, and used tin snips to cut them to the desired shape and size.

tin Collage

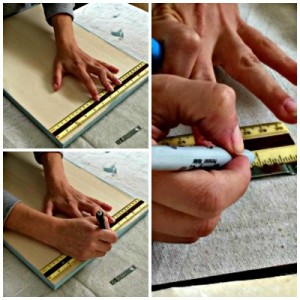
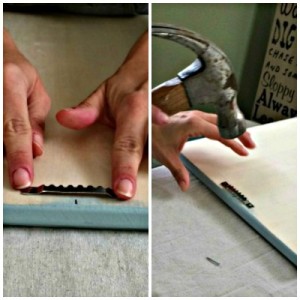
Step 11: Affix the picture frame hanger on the back. First, find the center of your plaque and mark it with a pencil. Then, find the center of the hanger and mark it with a marker. Next, align the two marks and nail your hanger to your plaque.

hanger collage

Hanger Collage 2

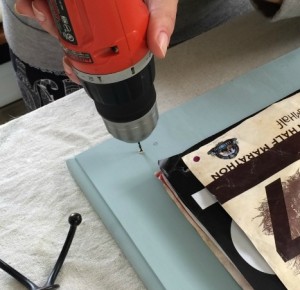
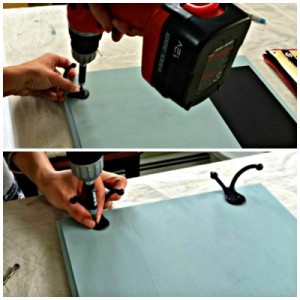
Step 12: Affix your medal hooks. Decide where you want them to go, and mark the screw holes with a pencil. It’s easier to start the holes using a drill and a bit. Using the hardware that came with your hooks, attach them to your plaque.

hooks

hook Collage

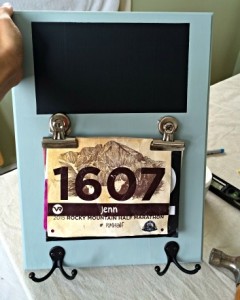
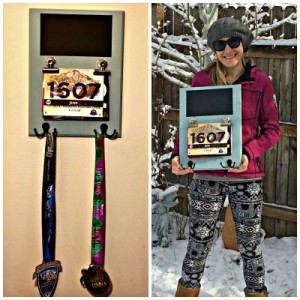
Step 13: Celebrate because YOU ARE DONE. And you rock! All that is left to do is hang your new medal rack. Then, attach your bibs to the clips and hang your bling from the hooks. Look how awesome you are!

I had my magnetic clips a little crooked in this shot, but you get the idea.

I had my magnetic clips a little crooked in this shot, but you get the idea.

finished Collage


I am loving how this project turned out. Now, I just need more medals to hang from it!

How do you display your medals? Have you made your own rack, or anything else, for that matter? Tell me all about it in the comments!

Costume Tutorial: Running Skirt with Pocket Waistband

Ever since I started running, I’ve sort of become obsessed with running clothes. The sewist in me wants to understand their construction, function, and style, and then I make them for myself with my own twists. I always have to carry a lot of crap with me on the course. My car key, phone, earbuds, license, cash, and most annoyingly, my stupid, goofy-shaped inhaler that fits into no running waist belt I’ve found yet. I needed something custom made for all my stuff.

Then there’s the costume races where you are making your outfit top to bottom and need to hold a hotel key and extra pixie dust in your Tinkerbell tutu. The struggles are so real, especially as I begin to plan my costumes for the Rebel Challenge. I mean, where/how am I going to attach my lightsaber to my adorable outfit? I know the solution is to craft my own running skirt with a waistband pocket built into it. I practiced this idea with the Flintstones costumes I made for Meri and I, and now I’m sharing the technique with all of you.

YES. MY. FRIENDS. Are you excited? Please say yes because I am SO STOKED to show you this easy pattern. This will take you one afternoon. No joke. Heck, you can even skip adding the skirt and you’ll have a pocket belt that you can wear with anything.
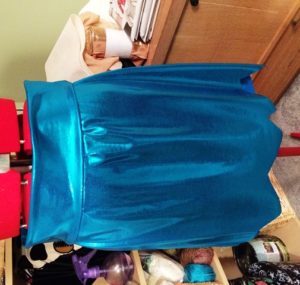
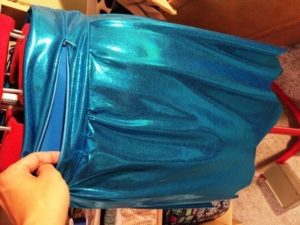
alldone2


Alldone1
Now, if you’ve sewn before, don’t let the word zipper send you screaming from your computer right now. If you’ve never sewn in your life, don’t let the word zipper send you screaming from your computer right now. This is simple stuff, friends, and if you have to do a zipper, this is the kind of easy zipper install you want to do. Trust. The trick is basting and using an invisible zipper foot, and I’ll get to that in a sec.

What to Expect: After you’re done with this project, you will have a running skirt with a 4 inch pocket that goes all the way around the waist for maximum storage. I have not yet mastered building in a sport panty, but I will master that for a future tutorial, promise!

Here is what you need for this project:

  • Stretchy Athletic fabric of your choice. Follow the yardage guidelines on your skirt pattern, and add 1/3 of a yard for the waistband.
  • Color Coordinating thread
  • Color Coordinating Invisible Zipper, minimum of 7-9 inches long (you can shorten a zipper very easily if you can’t find one the right length in the right color. Youtube how to, yo!)
  • Skirt Pattern
  • Stretch Sewing Machine needles, these are ball point needles made for sewing stretchy fabrics
  • Invisible Zipper Foot
  • Standard Presser Foot
  • Zig-Zag Presser Foot
  • Straight Pins
  • Tape Measure

Tools that make any sewing job easier: Cutting mat, rotary cutter, large plastic ruler, fabric marking pen or tailor’s chalk

**These instructions include ½ inch seam allowances.

And here we go!!

Step 1: Read these instructions all the way through at least once before beginning.

Step 2: Measure your waist in inches. Take that number, divide it in half, then add 2 inches. This is your width measurement for cutting your fabric.

Step 3: Fold the fabric lengthwise right sides facing together, so that the selvage ends meet. Cut two pieces, 9* inches x the width measurement you got in step 1.

(*Note: This 4 inch waistband will accommodate an iPhone 5. If you have a larger phone or need a wider waistband, simply increase the number from 9 inches to whatever you need. Just remember that there is one inch built into this pattern for 1/2 inch seam allowances. Example, if you want a 5 inch waistband, 5 x 2 = 10 inches plus 1 for seam allowance, therefore, you would cut your two pieces 11 inches x the width measurement from step 1.)

Step 4: Set one of the two pieces you just cut aside. Lay the remaining piece flat and measure 2 ½ inches from the bottom edge. Mark this line with your fabric pen or chalk. Cut all the way across lengthwise.
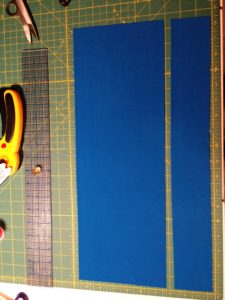
Step 3

Step 5: Position your zipper in the center top edge of the smaller section. Baste the zipper in place with the right side of the zipper facing the right side of the fabric.
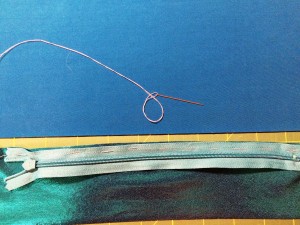
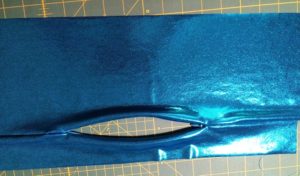
Step 4Step 6: Next, you’ll need to use an invisible zipper foot. You can usually find universal versions of the invisible zipper foot at stores like Joann Fabrics or Hancock Fabrics. Notice the two grooves in the bottom center of the foot.Zipper footYou’ll also notice the hole in the center, that is for needle to pass through.
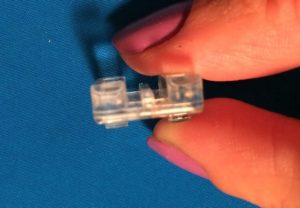
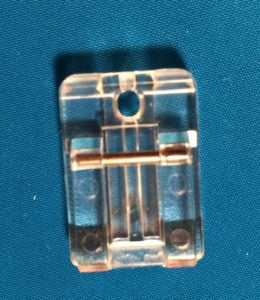
IMG_0114

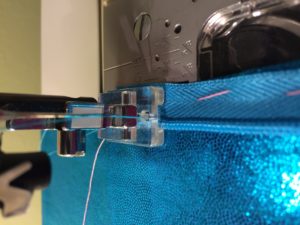
Position your work under the foot so that the zipper fits into the groove on the left. Make sure the zipper is open, and stitch using a straight stitch.
closeup

And when you’re done it should look something like this!
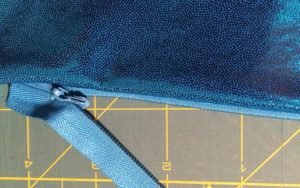
That wasn't so bad, right?

That wasn’t so bad, right?

Step 7: Close zipper, remove basting stitches, and repeat Steps 4 and 5 the other side. Make sure to line up your pieces along the zipper edge and the short sides.
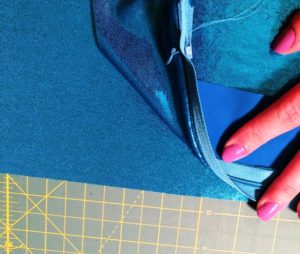
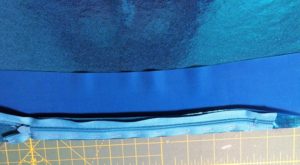
Step 6-1

Step 6-2

Basting ( big, chunky temporary stitches) is the secret to professional looking zippers. Take the time for this step!

Step 8: Repeat step 5, stitching until the zipper’s pull gets in the way and you can’t stitch any further.  When you’re done it will look like this:Step 7Don’t worry about the gaps on each end, we’re going to fix that next.
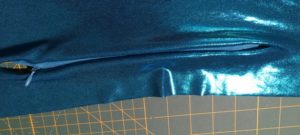
Step 9: Matching right sides of fabric together, pin from each end of the zipper to the edge of the fabric, being sure to match up the edges, too.Step 8-1
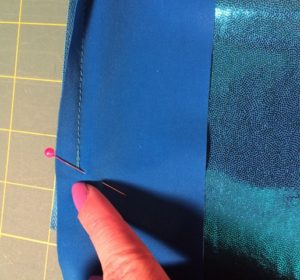
This is the trickiest part of this project; first, change your press foot back to a standard foot and stitch from where your zipper ends to the edge, thereby completing the seam and joining the two pieces of fabric all the way across. It may be a little bumpy and jagged around the ends of the zipper, but that’s okay. It will still work just fine!
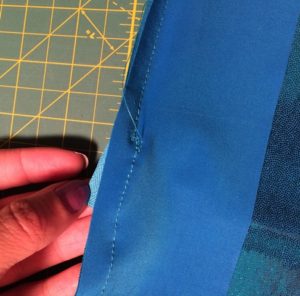
step 8-2

Mine was far from perfect but it’s all good.

When you’re done, it should something look like this when you look at it from the right side.
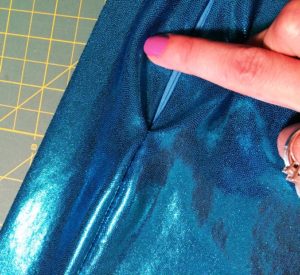
step 8-3

step 8-4

step 8-5

CONGRATULATIONS! You’ve completed the hardest part of this project! You fricken ROCK! We are seriously SO CLOSE to being done!

Step 10: Remember that other piece of fabric that you cut and I told you to set it aside? Well bust that puppy out and let’s do this! Line it up with the zippered piece right sides together, and pin it along the short sides.
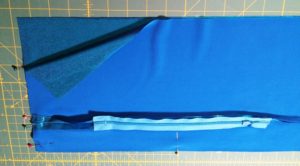
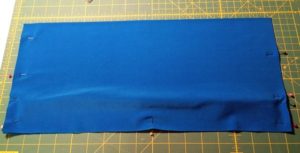
Step 9-1

step 9-2Change your foot to a zig-zag foot and adjust the settings on your machine as appropriate. Zig-zag stitch the pinned sides.
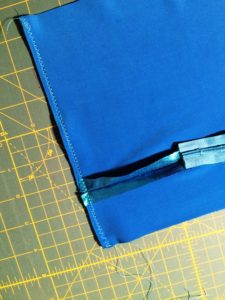
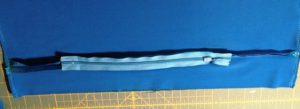
step 9-3

step 9-4

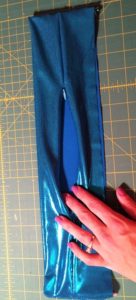
Step 11: Turn the waistband right side out and try it on! Woot woot! If it’s too loose, now is the time to take it in. Simply turn it inside out again and stitch the side seams in a little further from the edges. Repeat that process until the band fits over your hips but also fits your waist. Because you’ve been using a zig-zag stitch where needed, the skirt will stretch. Once you have it fitted, trim off any excess seams/fabric on the inside and turn it right side out.
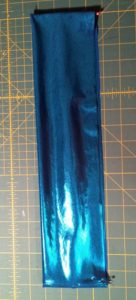
Step 10-1

step 10-3

Pocket Belt Option: If you want to make a pocket belt instead of a running skirt, then this is is your last step. Tuck the two touching raw edges to the inside of the band, making a seam. Essentially, you’re making a tube. Once you tuck the edges and pin in place all the way around the bottom edge of the band, top stitch using a zig-zag stitch.  When you’re done, you should have a fabric tube, like a bicycle tire, with a zipper. (Oh my goodness, I hope that makes sense).

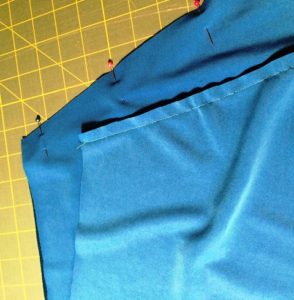
Step 12: Using a skirt pattern, cut the front and back skirt pieces following the layout instructions that come with the pattern. Pin the front and back of the skirt together, right sides facing each other. Using a straight stitch, stitch the two sides together.
step 11-1

Step 13: For a pleated skirt look, baste along top edge of skirt. Gather the skirt fabric until it is the same circumference as your waistband, making sure the pleats are evenly distributed all the way around the skirt.

If you want an a-line style skirt, use an a-line skirt pattern or simply skip the gathering step above and adjust the skirt until its waist is the same size as your waistband.

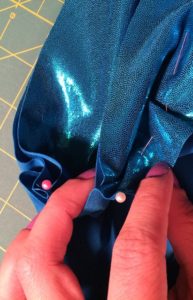
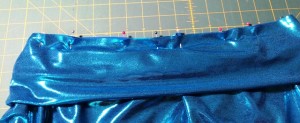
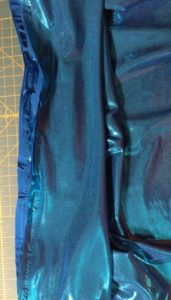
Step 14: Pin the raw edge of the waistband to the raw edge of the skirt with the right sides together. Make sure to match the side seams of the skirt with the side seams of the waistband.
step 13

step 13-1

Step 15: Using a zig-zag stitch, attach the skirt to the waistband.
Step 14

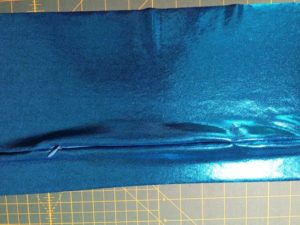
Step 16: Shorten the skirt to desired length and trim off excess. Athletic fabric typically doesn’t fray and won’t need hemming, but if your fabric is fraying you’ll need to hem your skirt. To do that, fold the raw edge to the inside of the skirt 1/4 to 1/2 inch all the way around, and then another 1/4 to 1/2 inch all the way around. Pin in place as you go. Then, top-stitch using a straight stitch.

YOU ARE DONE! HIIIIIIGH FIVE, YOU! You now have a cute, functional running skirt that you made YOURSELF. I’m so proud of you!

colin

Now, I want to see YOUR skirts. So go forth, dust off your sewing machine or rescue one at your local Goodwill, and send me your pics! I’m excited to see what you guys come up with! Share your pics on our Facebook page or tweet me at @Scootadoot or @jenniferspen
I’ve never written out my patterns before. If I’ve utterly confused you, I’m sorry, and I want to fix it! Please email me your questions at Scootadoot@gmail.com with the subject “Skirt Tut” and I will respond to you as soon as I’m able.

**This design did come out of my head, and any resemblances to patterns currently for sale in the market place is coincidental. No copyright infringements were intended.