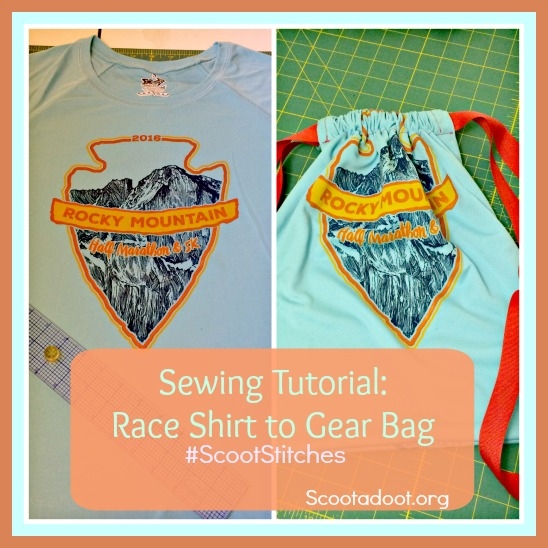
I’m guessing you have a TON of t-shirts laying around. As runners, we accumulate them like we accumulate safety pins. That’s why I thought a tutorial on how to make a gear bag out of a race shirt would be a great Scoot Stitches first project. When I floated the idea by Meri and our Facebook and Instagram friends, they all agreed! So here is a super simple project that is perfect for the first time sewist, and is even kid friendly (with supervision and help, of course). I’ll let you know when I think up some ingenious use for the safety pins beyond the norm.
This project is easy, it took me an hour, and honestly, I didn’t really measure or get too exact on this one. And that’s the point, don’t over think it. It’s just a bag, keep it fun and have fun with it. if you mess up, who cares? You’ve got plenty of shirts in the dresser, right?
Supplies: Race shirt, 1 spool of thread (if it matches in color, great, if not, it’s cool), scissors or rotary cutter, straight edge/ruler, straight pins, fabric marker or chalk, 1 three yard spool of 1 1/2 inch wide ribbon, sewing machine, Stretch Sewing Machine Needles (see step 3).
Step 1 -Read these instructions all the way through before starting.
Step 2 – Cutting the Panels First, you’re going to cut your shirt to make the two panels for the bag. Here are two methods depending on the tools you have:
Scissors and Fabric Marker Method: Lay your shirt out flat making sure there are no wrinkles. Lay the ruler along one side, matching it to the seam and the top of the shoulder (see pics below). Draw a dotted line long the right side of the ruler. Using pins, pin the two layers together just inside the dotted line to keep them in place. Repeat this on the other side seam, the top just below the collar, and the bottom. Next, cut along the dotted lines. After you have your rectangle shape, take out the pins along the top, but leave the rest in.

Rotary Cutter Method: Line up your ruler as shown above, and cut along outside edge. Once cut, pin. When you’re done, it should look like the photo below; all squared up and ready to stitch! **Note if working with a larger sized shirt, you may want to trim the sides and bottom to make a more narrow rectangle. DO NOT trim from the top, you need that extra fabric for a later step.

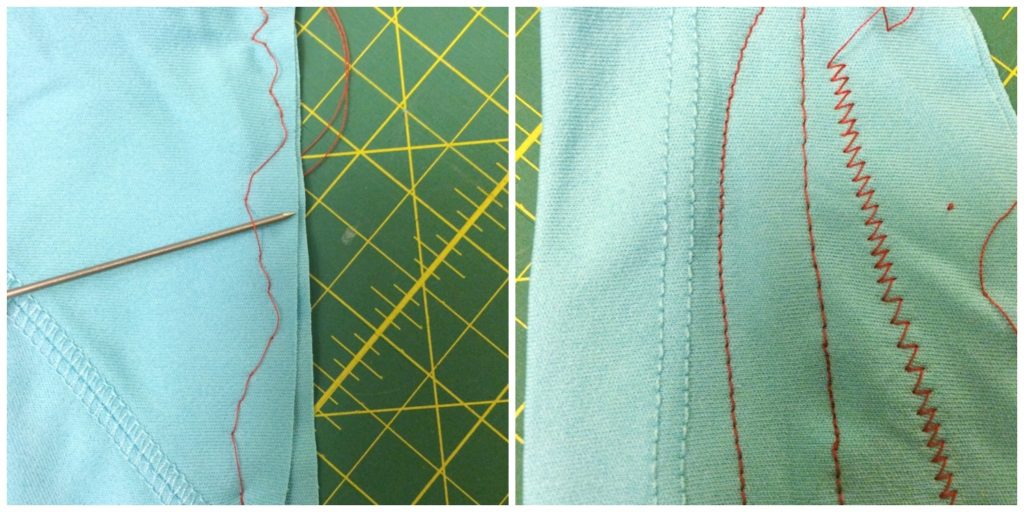
Step 3 – Practice Stretch Stitching Make sure you are using a stretch sewing machine needle for this project, and adjust your machine to stretch stitch settings (refer to your manual, or use a zig-zag stitch if you don’t have a stretch feature). Using some scraps that you cut from your shirt, stitch some practice seams to make sure your needle is catching the bobbin thread and sewing properly. With the practice swatch on the left, I used the #75 stretch needles, and my machine was skipping stitches. After I switched to the #90, I got the results I wanted. The right needles make ALL the difference.

Helpful Info!
Step 4 – French Seam A French seam will keep the fabric from unraveling on the inside of your bag. With the wrong sides together, start stitching 3 and 1/2 inches from the top and stitch the sides and bottom with a 1/2 inch seam allowance (I use the edge of my foot for a guide).

Trim off the corners and excess fabric. You should now have something that looks like a pillowcase. On the back panel, measure 2 1/2 inches from the bottom and mark that spot with a marker or a straight pin. Next, take your ribbon and cut 2, three-ish foot lengths (this is where I kinda eyeballed it). Match one end of each ribbon at an angle to the marks on each side and pin in place. I looped and pined the extra ribbon to the center just to keep it out of the way. Trim the ribbon so its edge lines up with the bag (I didn’t snap a photo of that, but you get the idea).
 Next, turn it inside out so that the shirt graphics are on the inside,and stitch the sides and bottom again just like before, only this time, do a 5/8 inch seam allowance. Stop stitching 3 and 1/2 inches from the top. When you turn it right side out, it should look like the photo below.
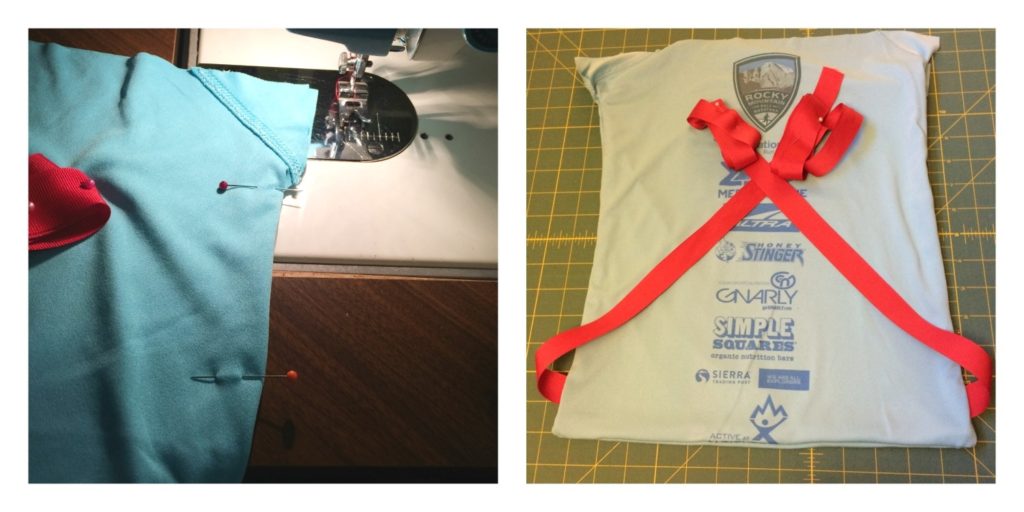
You are almost done, can you believe it!?!? It’s starting to look like a bag, so pour some wine to celebrate your accomplishment! YOU ARE EPIC.
Step 5 – Make the “Casings” The casing is that part at the top where your ribbon is going to go through. Turn it right side out so the graphics are on the outside. Fold the raw edges over once, pin and stitch each flap. Repeat on other side.
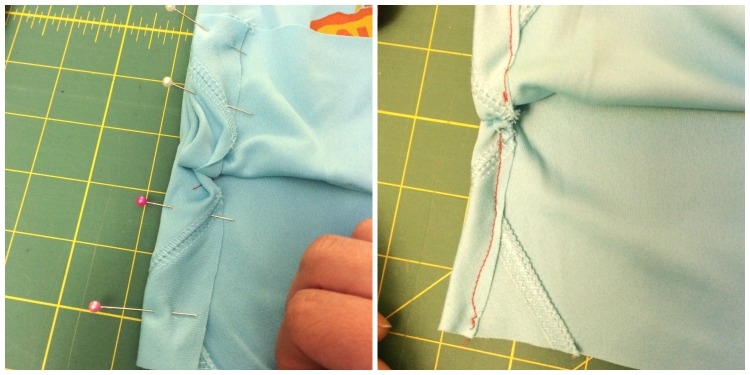
Then, using the ribbon as a guide, fold over the flap and pin, making sure it’s wide enough for the ribbon. Stitch as shown (note, you’re NOT sewing the ribbon in, you’re just making a pocket for the ribbon).
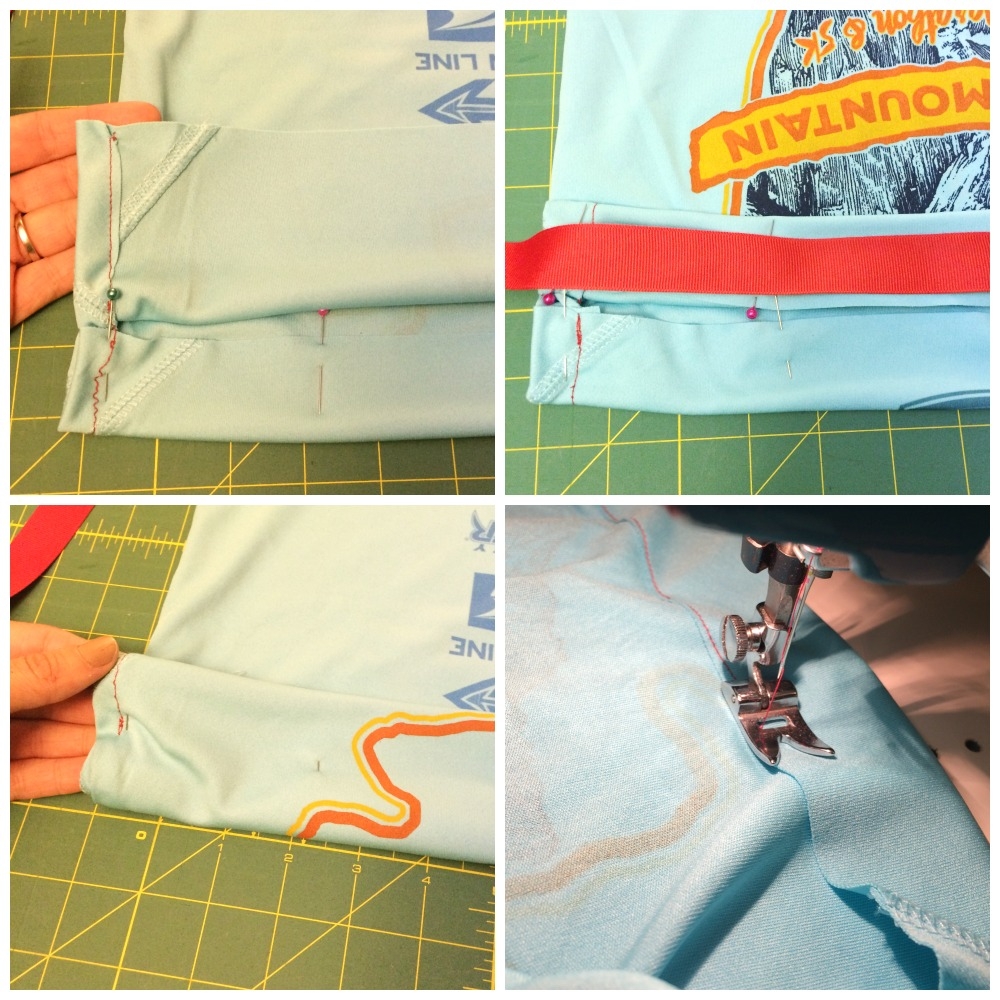
Step 6 – Thread the Ribbon Starting on the right side, fold the ribbon over once and pin a safety pin through both layers. The larger the safety pin, the larger the better, but even a bib safety pin will work. (Yay, we used them!) Feed the ribbon through the casing from the back to the front. Repeat on the other side feeding the ribbon from front to back.

The last thing to do is to trim off the extra ribbon, fold over the cut edge, and stitch the loose ends as shown below.
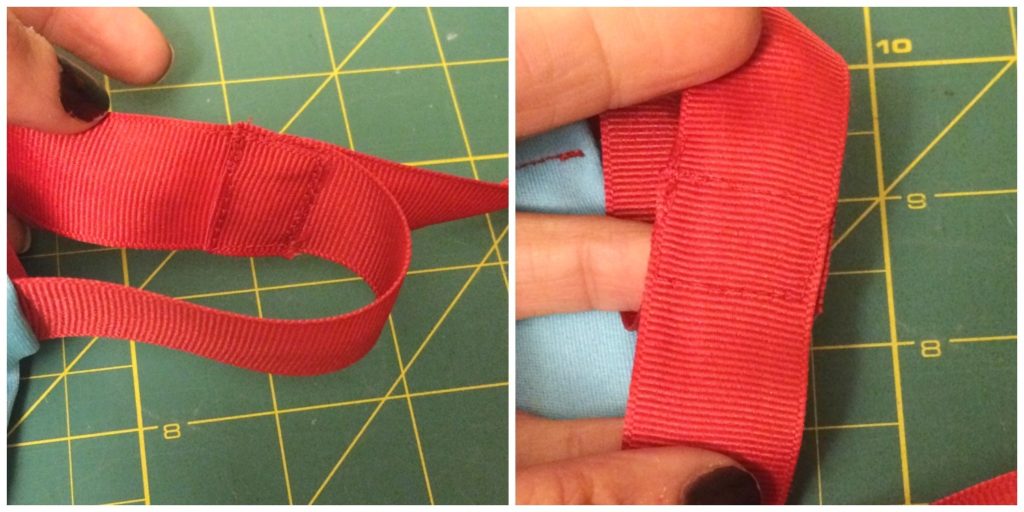
And you are finished already!
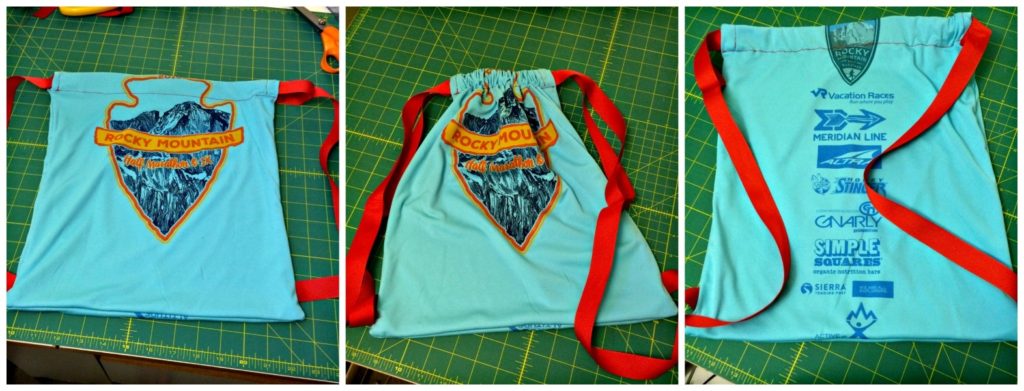
Outcomes: You just learned three major sewing techniques!!
Drawstring bag construction: If you skip the step of sewing the ribbon to the bottom of this bag, then you’d have yo’self the basis for a laundry bag, make-up bag, evening bag, a washing bag for unmentionables, or whatever else you can put in a bag.
Casings are used in all kinds of applications from elastic waistbands to roman shades. Chances are excellent you’ll use this again.
Lastly, the advanced couture French seam. LOOK AT YOU GO. They are handy when you don’t have a serger machine (visit www.stitchandsew.net/best-sewing-machine for more details), but are working with a fabric that will fray, causng your seams to come apart. That’s why we used it here. It encases the raw edges of the fabric to prevent unraveling at the seams. French seams are also handy if you need to alter the size of a garment. That’s why you usually only see a French seam in wedding gowns.
So that’s it for this lesson. I hope you enjoyed this easy project. Share your finished bags with me on social media, I’d love to see them! Tag your pics with #scootstitches. If you have questions about the tutorial, you can email me at scootadoot@gmail.com.
Get out there and get crafty!


