How to Sew a Patch – Scoot Stitches

Happy Friday, Lovely People! I’m bringing back our Scoot Stiches series today to show you how to sew a sew-on patch. BOCO Gear sent all their 2019 Ambassadors a sew-on patch, and I quickly realized not many folks know this easy-to-learn skill. The great thing about patches is that you can sew them on to just about anything, and today’s video tutorial will show you how in a snap! I’ll be sewing my patch onto my Skirt Sports Toasty Girl Vest (which I love).


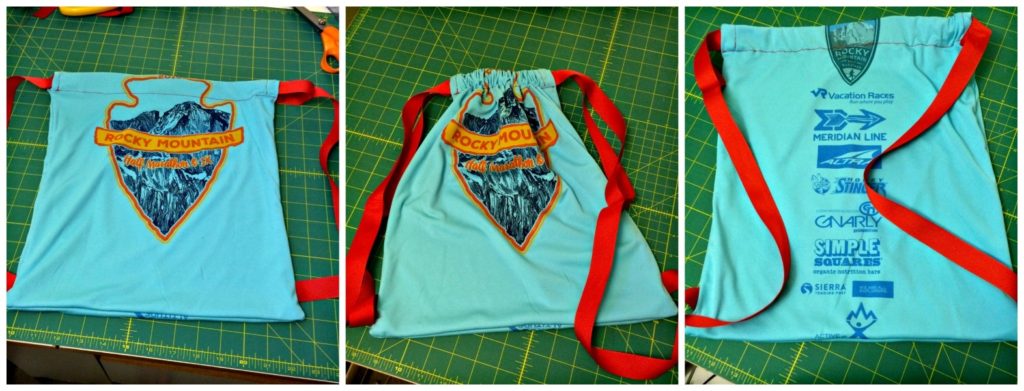
Check out some of our other tutorials in this series; Make a Running Skirt with a Waist Band Pocket, and Make a Gear Bag from a Race T-Shirt

Scoot’s Most Popular Posts

Sometimes, it’s hard to believe Scoot A Doot has been going strong for six years. It’s fun to take a look back over all our posts and remember the race destination or recipe that inspired us to share a post with you. It’s also fun to take a look at the stats and see which ones are the most popular over time. Today, I thought I’d share a look at our most popular posts. The top five posts on our blog cover everything from food to costumes to inspiring a positive body image in our kids.

The Color Run vs. The Color Vibe

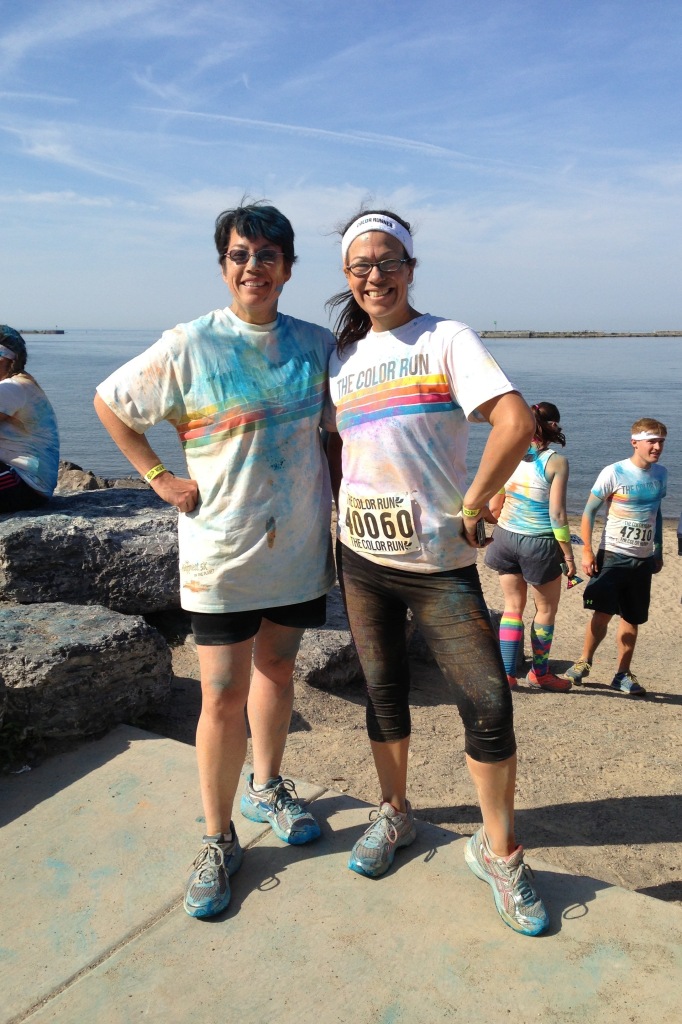
Far and away our most popular ever post is retired Chick Victoria’s comparison of the Color Run and the Color Vibe races. When theme races were in their heyday, everyone wanted to know which of these two packed the biggest colorful punch.  Vic dishes on her experiences at both, and reading this brought back memories of my own Color Run. We all need a little nostalgia sometimes.

Costume Tutorial – Running Skirt with Pocket Waistband

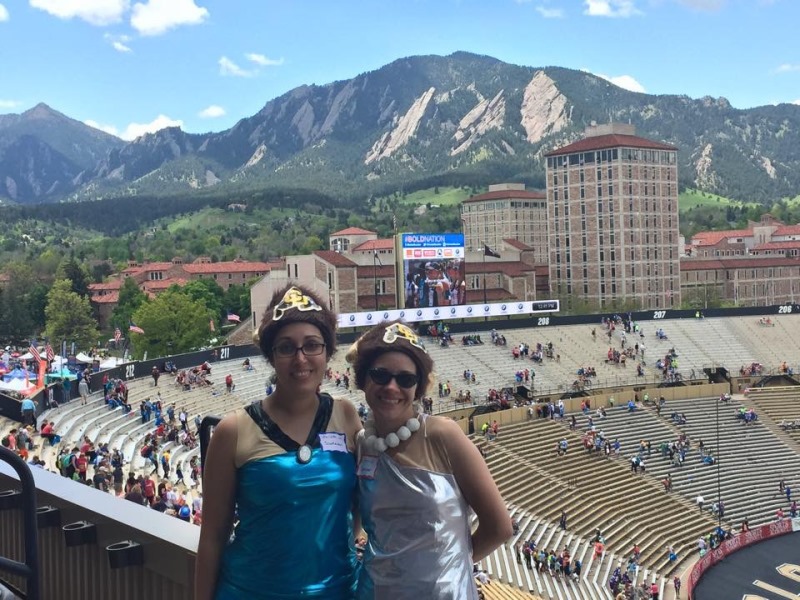
When Meridith and I ran the BOLDERBoulder together in 2015, we knew we needed special costumes befitting the 3rd largest road race in America. Going with the whole rock theme, we settled on Wilma and Betty from the Flintstones. I decided it was the perfect chance to try making a running skirt with a pocket, and an even better opportunity to document the whole process so you can make one, too.

Ready for a nap. And beer. Maybe beer, then nap.

Product Review: Buff Butter

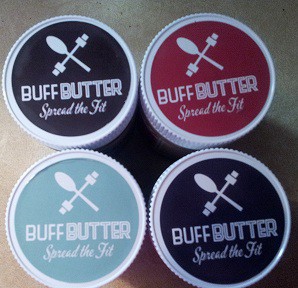
Retired Chick Bec was a nut butter nut, and got everyone excited to try Buff Butter. The company is  now called Buff Bake, and Bec gushed over three of the four flavors she tried. To quote her, “If you haven’t heard of Buff Bake’s butters, it is a line of high quality nut butters with added whey protein. Depending on the flavor, you’ll also see things like hemp, chia and flax seeds and organic coconut palm sugar. And, it comes in awesome flavors like Snickerdoodle Almond Butter and Cinnamon Raisin Peanut Butter, just to name a couple.”


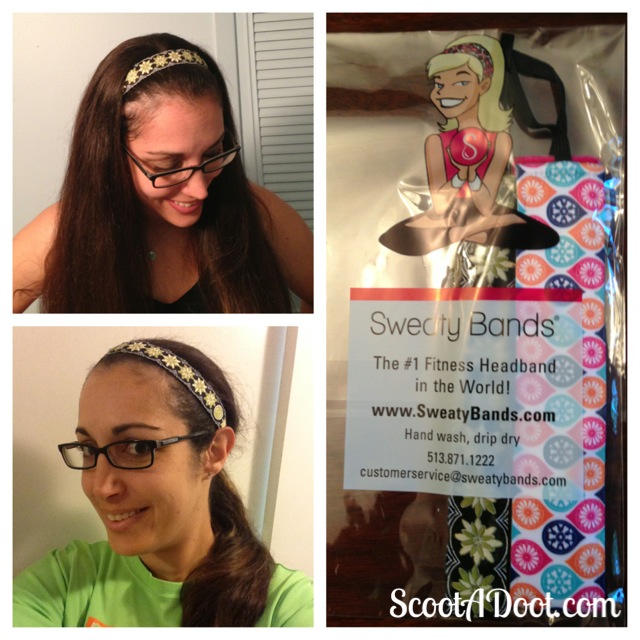
Road Tested: Sweaty Bands

once upon a time, Meridith had a MAJOR problem with headbands. Her thick goregous hair (trust me, I’ve braided it) could not be contained by just any headband. She gave Sweaty Bands a run way back in 2013 and she was a big fan. I later bought one at a RunDisney expo and loved mine, too.  Skeptical? See for yourself in Mer’s review!

The Most Important Thing About Me

One of my favorite posts is from retired Chick Cam, and some insight she gained into the mind of her then eight year old daughter. If you’re a parent, especially of girls, this post will speak to you. Even if you aren’t a mom, you’ll remember being easily manipulated by society’s expectations of what’s healthy and beautiful. It’s a reminder to jump off that bandwagon.

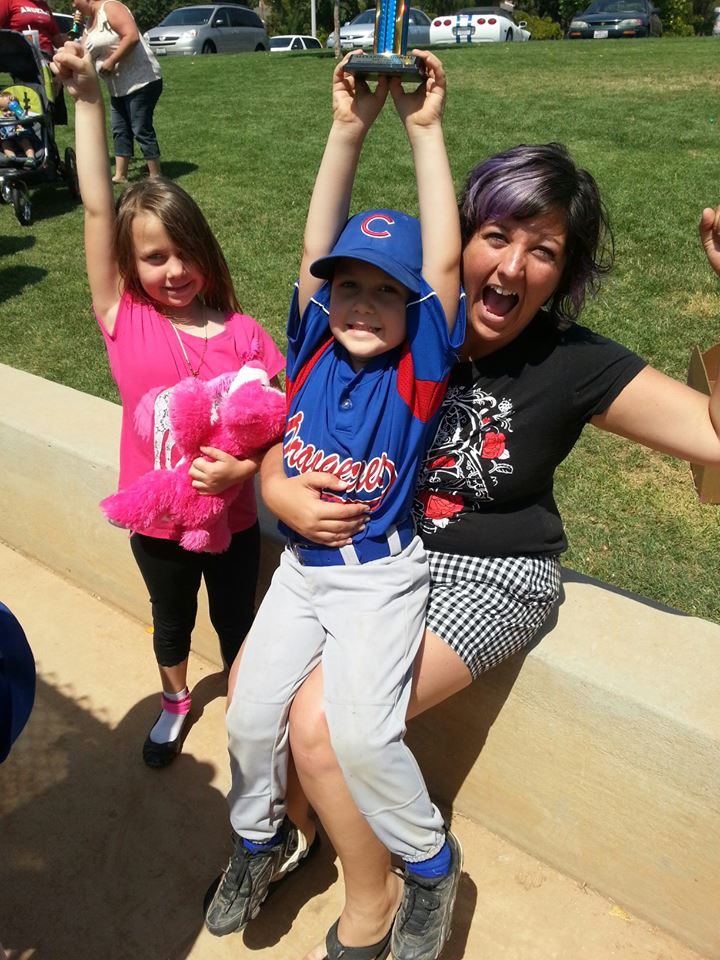
We are the champions!


With nearly one thousand posts on the site, there’s quite the archive to browse through. I hope you find a few more things that speak to you. Be well, friends!


What to Pack for a Hike

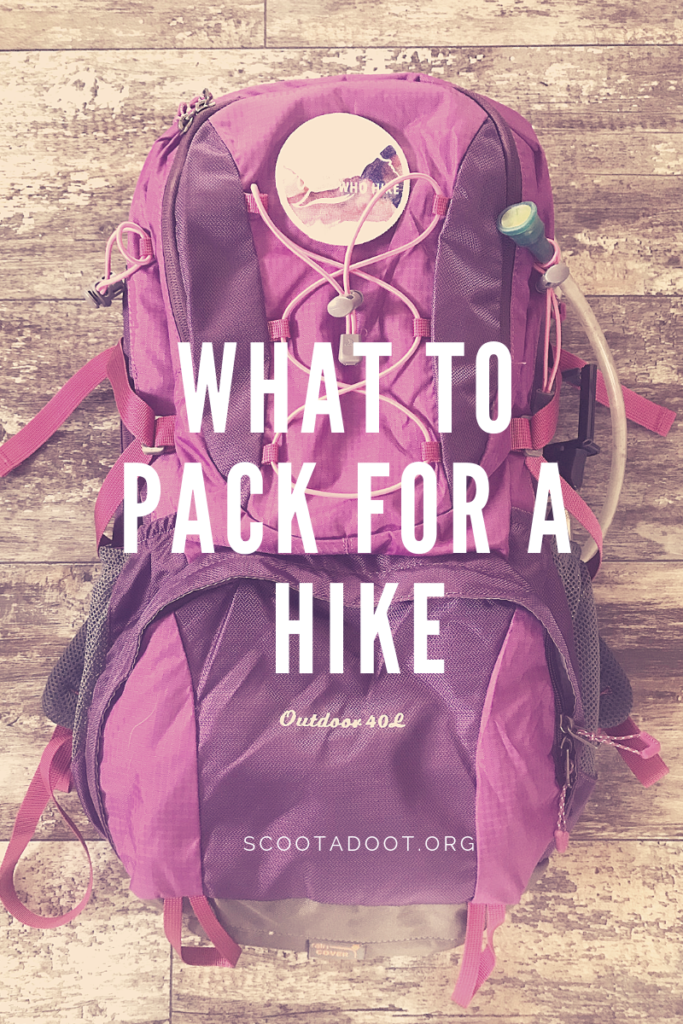
My new hiking pack, something I’ve desperately needed if I’m going to do the #52hikechallenge, arrived this week! I’ve been so excited about it that I’ve spent far too many hours gathering and packing and repacking it with all my gear. Then I realized this is information worth sharing, so here we go with what to pack for a hike!

First, let me give a shout out to a very important list you should refer to if you’re planning your own forays into the backcountry. The National Parks Service has posted this 10 Essentials to pack when you #optoutside.  I don’t quite have everything on this list, but I’m working on it and plan my hikes accordingly.

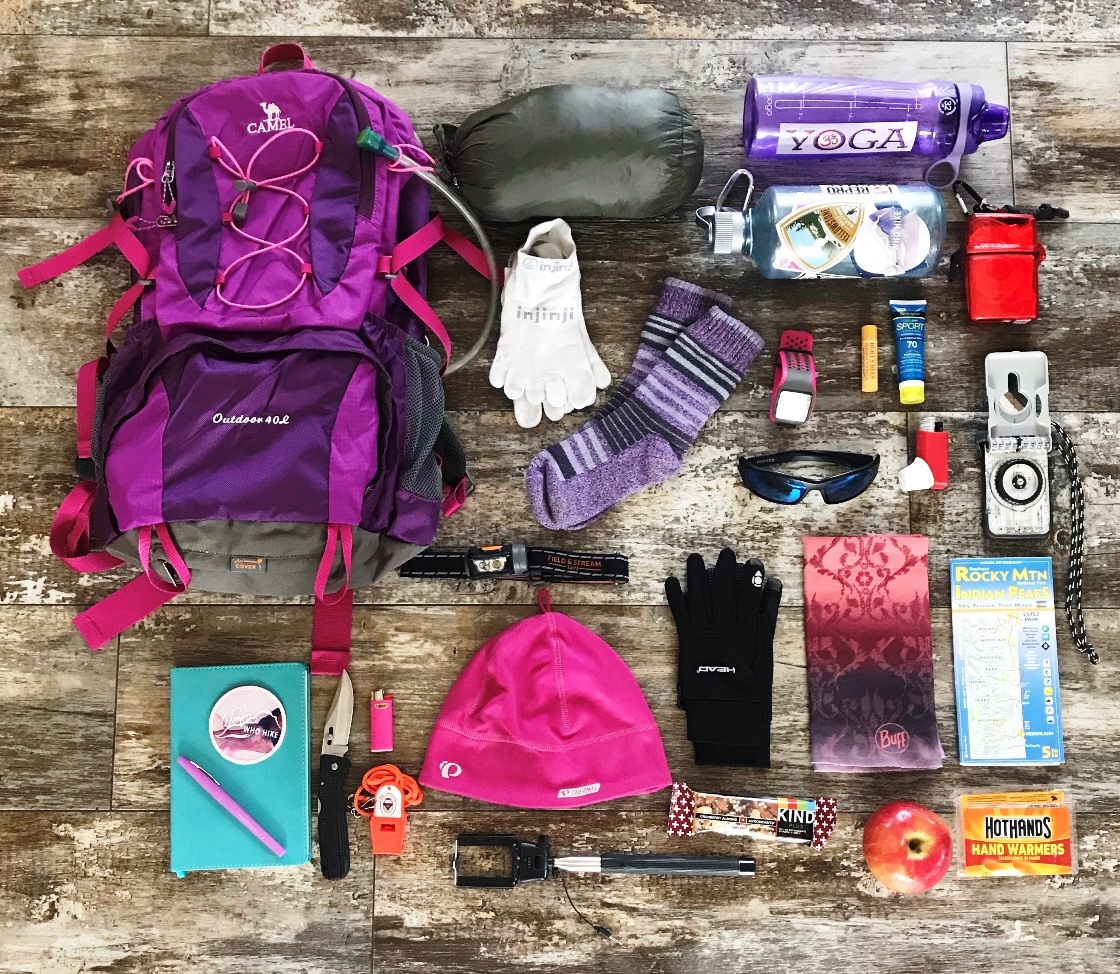
The spread. It’s very purple-y.

Here’s what I never leave home without:

  • Day Hike Pack – This pack from Camel has a space for a water bladder, has an internal frame, and is intended for day hikes. It’s a bright color (I love any shade of purple) so I can’t mistaken for an animal.
  • Water – In addition to my water bladder, I carry two, 32 oz bottles of water, too. Tip, if you store them upside down, they won’t freeze at the mouthpiece. 
  • Map & Compass – It’s important to know how to use them, too. Many local wilderness rescue groups offer classes on this topic, often for free. Always remember to tell someone where you’re hiking, how far, and when you expect to be back. Check in with that person when you get home.
  • Extra Clothes – Because I’m prone to blisters, I bring a pair of toe socks, as well as an extra pair of dry wool hiking socks. I also pack a down vest, an extra thermal beanie, extra thermal gloves, and a Buff.
  • Survival Gear – A lighter or matches, a headlamp, a basic first aid kit, a knife, some handwarmers, and an emergency whistle are what I keep in my pack at all times. On day trips I keep my survival gear to a minimum because I’m careful to follow the trail and be super aware of my surroundings and map.
  • Personal Gear – Sunscreen, Lip Balm, my asthma inhaler, my TomTom GPS watch, and sport sunglasses are all essential for a comfy hike at high altitude.
  • Snacks – The most important things! I’ve always got a nut based snack and an apple at minimum.
  • Fun Stuff  – A small notebook which is my Trail Journal, a pen, a selfie stick, and my #womenwhohike patch.

I hope that helps you decide what to pack for your hikes!

What gear is essential for you when you #optoutside? 

How to Trail Run

Trail running is something I’ve been wanting to take up and do more of. For the last several years, I’ve lived a thirty to forty-five minute drive to the good trails in my nook of Colorado. It was a lot of effort that took way too much time; get up super early, dress, eat, drive forever, get at least an hour run in, drive home. That’s half the morning gone! I should have tried harder.

But now that I’m moving to a rural area of the mountains and will be doing all my training runs in my new neighborhood of hilly (understatement) dirt roads and U.S. Forest Service trails, I knew I needed to learn how run safely in the high country. It just so happened that my favorite local running store/brew pub (yes, you read that right), Shoes & Brews, was hosting a trail running clinic with Salomon Running. PERFECT. It was providence for sure!

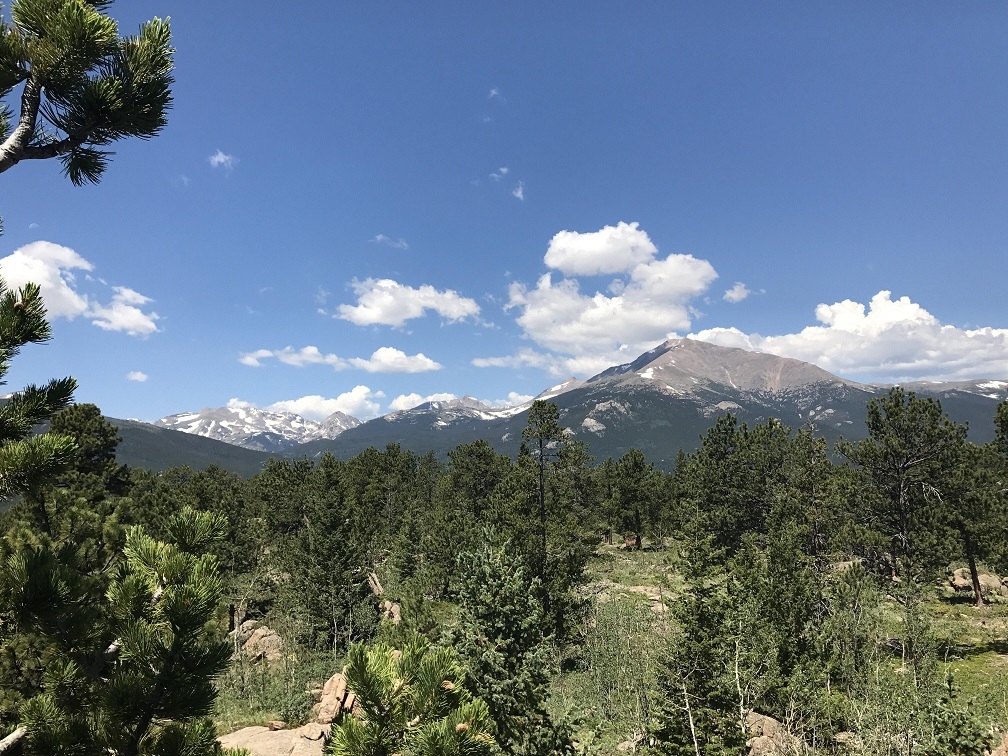
My new neighbor, Mt. Meeker the Fourteener!

I’m so glad I went. It was helpful and informative, and it took some of the fear out of trail running for me. Here are some of the things I learned. Thanks, Salomon!

  1. Stay Upright Leaning forward constricts your airflow, so keep your torso upright and your head up despite the urge to lean into the hill.
  2. Stay on Your Toes Forget the heel strike. Staying on your toes makes you more agile through the rocks and other trail obstacles.
  3. Run on the Rocks If the trail is dry, go for solid surfaces over loose gravel when possible
  4. Run In The Water Don’t be afraid to run in the rivulets because there’s more loose sediment in wet conditions for your shoes to grip. In wet conditions, rocks can be slippery.
  5. Look Ahead Look 2-4 steps ahead of you to see where to step safely. Your brain can remember up to about 4 steps so stay safe by staying focused of your footfalls.
  6. Hip to Nip Move your arms like you normally would making sure they arc from your hip to your nip.
  7. Power Hike I didn’t know what this was until the clinic. It’s hard to explain, so go check out this great explanation from The Long Run
  8. Flail Like a Fool Flailing arms downhill is totally acceptable. No one will judge you for keeping your balance and not falling!
  9. Slow it Down Walking during trail running is a-okay! Even the pro who was with us, Courtney Dauwalter (who just broke a record for running 155 miles on a track in 24 hours) said so! It’s okay, really!
  10. What Goes Up On the downhill, lean forward a little to let gravity help you, but no so much you fall forward easily.
  11. Baby Steps Take smaller steps if you feel like you’re going too fast

Here’s Ester from Salomon with more tips


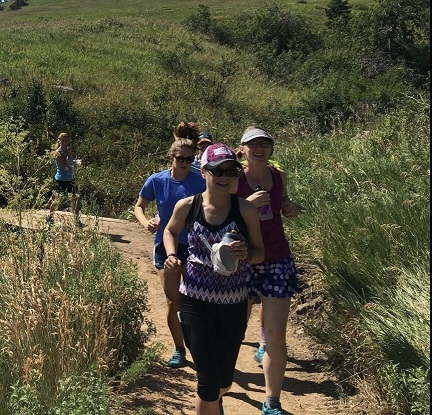
The trail we did was not for beginners, but it was a fun time and I met another Skirt Sports Ambassador, Becky! Making new friends is always fun, too.

Skirt Sisters!

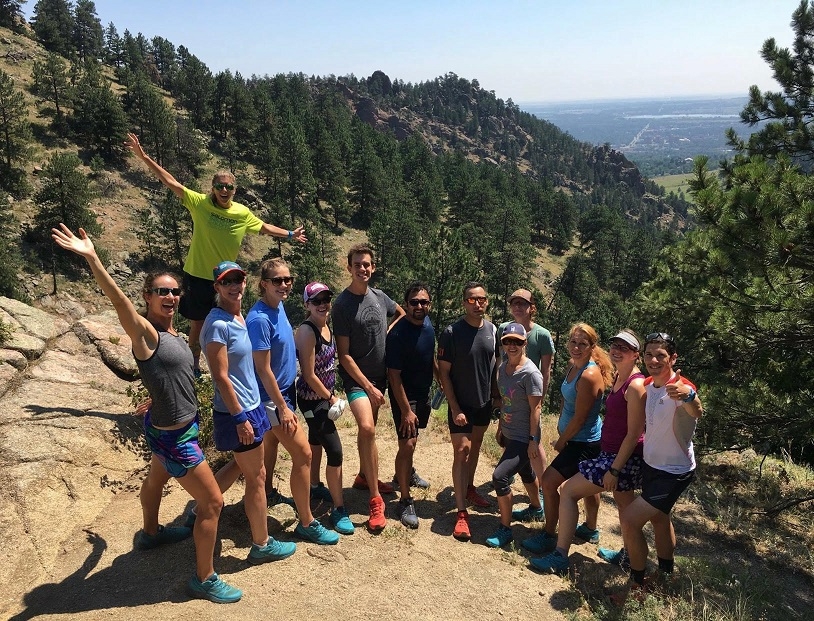
The group at the top

It’s safe to say that I’m hooked. I’ve been posting gorgeous shots of my recent trail escapades on our Instagram all week. I cannot wait to get out there again this weekend and run where I play!


Do you run trails? Where do you run? What’s your biggest piece of advice for beginners? Share it all with me, I’m in desperate need of wisdom!

Scoot Stitches Sewing Tutorial – Race Shirt to Gear Bag

ScootStitchesLogo2

I’m guessing you have a TON of t-shirts laying around. As runners, we accumulate them like we accumulate safety pins. That’s why I thought a tutorial on how to make a gear bag out of a race shirt would be a great Scoot Stitches first project. When I floated the idea by Meri and our Facebook and Instagram friends, they all agreed! So here is a super simple project that is perfect for the first time sewist, and is even kid friendly (with supervision and help, of course). I’ll let you know when I think up some ingenious use for the safety pins beyond the norm. 😉

This project is easy, it took me an hour, and honestly, I didn’t really measure  or get too exact on this one. And that’s the point, don’t over think it. It’s just a bag, keep it fun and have fun with it. if you mess up, who cares? You’ve got plenty of shirts in the dresser, right?
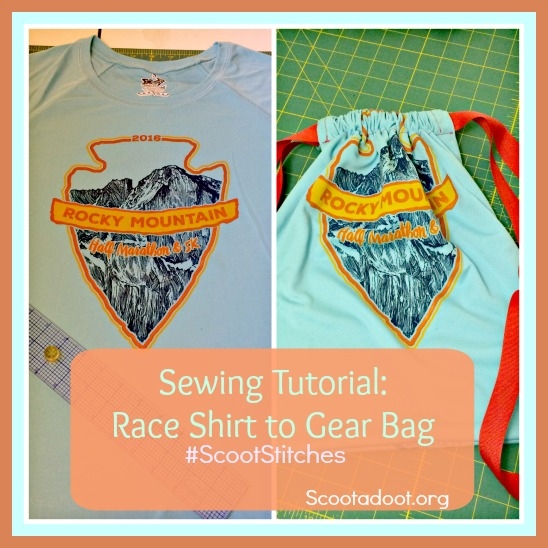
scootstitcheslesson2

Supplies: Race shirt, 1 spool of thread (if it matches in color, great, if not, it’s cool), scissors or rotary cutter, straight edge/ruler, straight pins, fabric marker or chalk, 1 three yard spool of 1 1/2 inch wide ribbon, sewing machine, Stretch Sewing Machine Needles (see step 3).

Step 1 -Read these instructions all the way through before starting.

Step 2 – Cutting the Panels First, you’re going to cut your shirt to make the two panels for the bag. Here are two methods depending on the tools you have:

Scissors and Fabric Marker Method: Lay your shirt out flat making sure there are no wrinkles. Lay the ruler along one side, matching it to the seam and the top of the shoulder (see pics below). Draw a dotted line long the right side of the ruler. Using pins, pin the two layers together just inside the dotted line to keep them in place. Repeat this on the other side seam, the top just below the collar, and the bottom.  Next, cut along the dotted lines. After you have your rectangle shape, take out the pins along the top, but leave the rest in.

step1

Rotary Cutter Method: Line up your ruler as shown above, and cut along outside edge. Once cut, pin.step1aWhen you’re done, it should look like the photo below; all squared up and ready to stitch! **Note if working with a larger sized shirt, you may want to trim the sides and bottom to make a more narrow rectangle. DO NOT trim from the top, you need that extra fabric for a later step.

step1b

Step 3 – Practice Stretch Stitching Make sure you are using a stretch sewing machine needle for this project, and adjust your machine to stretch stitch settings (refer to your manual, or use a zig-zag stitch if you don’t have a stretch feature). Using some scraps that you cut from your shirt, stitch some practice seams to make sure your needle is catching the bobbin thread and sewing properly. With the practice swatch on the left, I used the #75 stretch needles, and my machine was skipping stitches. After I switched to the #90, I got the results I wanted. The right needles make ALL the difference.
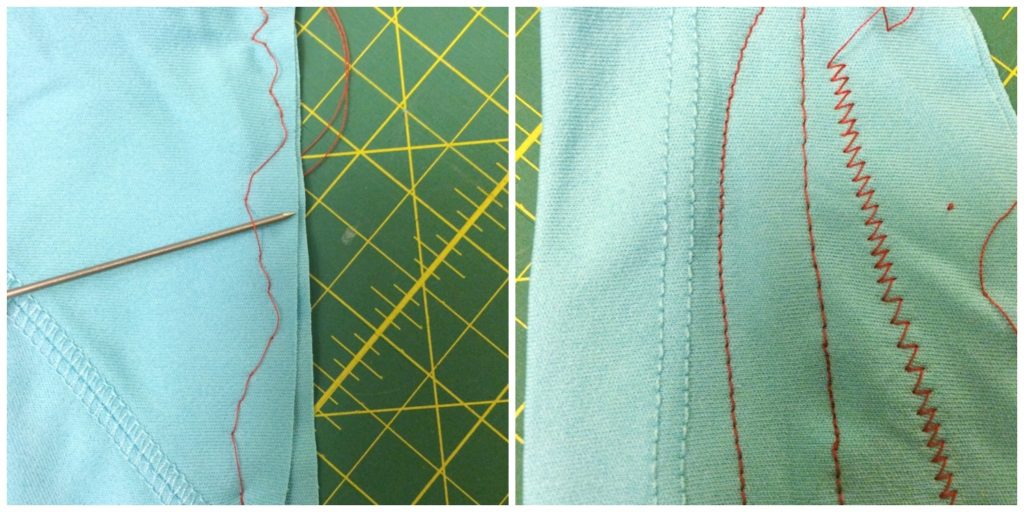
stitches

needles

Helpful Info!

Step 4 – French Seam A French seam will keep the fabric from unraveling on the inside of your bag.  With the wrong sides together, start stitching 3 and 1/2 inches from the top and stitch the sides and bottom with a  1/2 inch seam allowance (I use the edge of my foot for a guide).

step2

Trim off the corners and excess fabric. You should now have something that looks like a pillowcase. On the back panel, measure 2 1/2 inches from the bottom and mark that spot with a marker or a straight pin. Next, take your ribbon and cut 2, three-ish foot lengths (this is where I kinda eyeballed it). Match one end of each ribbon at an angle to the marks on each side and pin in place. I looped and pined the extra ribbon to the center just to keep it out of the way. Trim the ribbon so its edge lines up with the bag (I didn’t snap a photo of that, but you get the idea).

strapsNext, turn it inside out so that the shirt graphics are on the inside,and stitch the sides and bottom again just like before, only this time, do a 5/8 inch seam allowance. Stop stitching 3 and 1/2 inches from the top. When you turn it right side out, it should look like the photo below.straps3
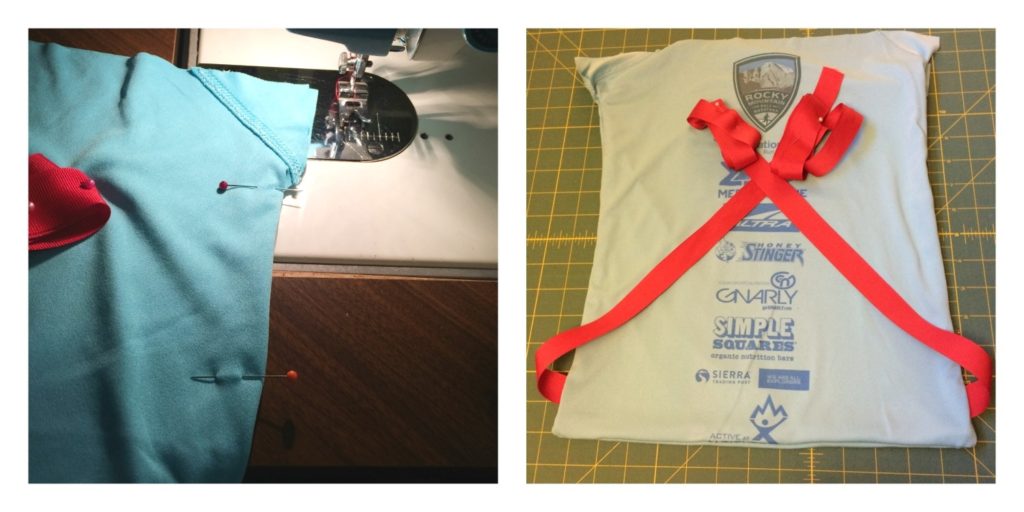
You are almost done, can you believe it!?!? It’s starting to look like a bag, so pour some wine to celebrate your accomplishment! YOU ARE EPIC.

Step 5 – Make the “Casings” The casing is that part at the top where your ribbon is going to go through. Turn it right side out so the graphics are on the outside. Fold the raw edges over once, pin and stitch each flap. Repeat on other side.
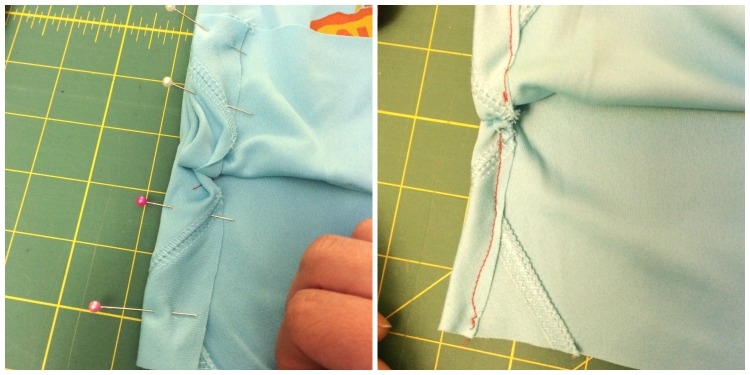
casing1

Then, using the ribbon as a guide, fold over the flap and pin, making sure it’s wide enough for the ribbon. Stitch as shown (note, you’re NOT sewing the ribbon in, you’re just making a pocket for the ribbon).
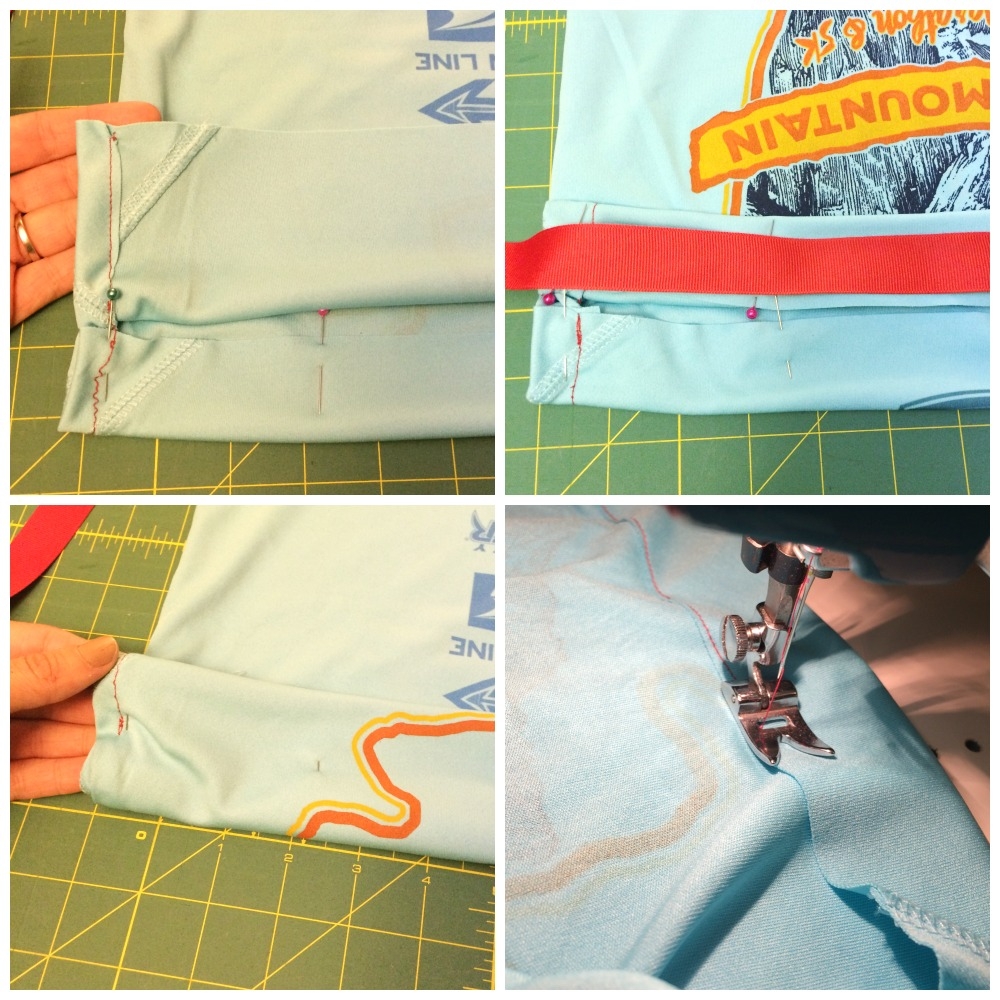
straps2

Step 6 – Thread the Ribbon  Starting on the right side, fold the ribbon over once and pin a safety pin through both layers. The larger the safety pin, the larger the better, but even a bib safety pin will work. (Yay, we used them!) Feed the ribbon through the casing from the back to the front. Repeat on the other side feeding the ribbon from front to back.

ribbon

The last thing to do is to trim off the extra ribbon, fold over the cut edge, and stitch the loose ends as shown below.
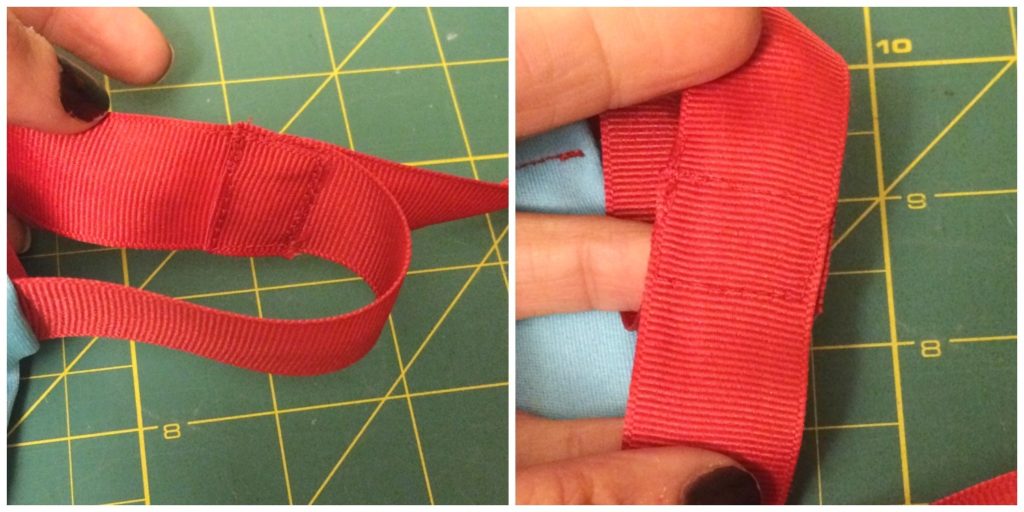
secureribbon

And you are finished already!

all-done

Outcomes: You just learned three major sewing techniques!!

Drawstring bag construction: If you skip the step of sewing the ribbon to the bottom of this bag, then you’d have yo’self the basis for a laundry bag, make-up bag, evening bag, a washing bag for unmentionables, or whatever else you can put in a bag.

Casings are used in all kinds of applications from elastic waistbands to roman shades. Chances are excellent you’ll use this again.

Lastly, the advanced couture French seam. LOOK AT YOU GO. They are handy when you don’t have a serger machine (visit www.stitchandsew.net/best-sewing-machine for more details), but are working with a fabric that will fray, causng your seams to come apart. That’s why we used it here. It encases the raw edges of the fabric to prevent unraveling at the seams. French seams are also handy if you need to alter the size of a garment. That’s why you usually only see a French seam in wedding gowns.

So that’s it for this lesson. I hope you enjoyed this easy project. Share your finished bags with me on social media, I’d love to see them! Tag your pics with #scootstitches.  If you have questions about the tutorial, you can email me at scootadoot@gmail.com.

Get out there and get crafty!

Save

Save

Save

Save

Save

Save

Save

Save

Save

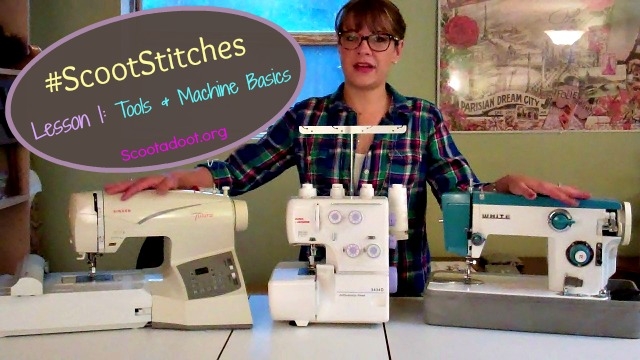
Scoot Stitches – Lesson 1, Machine & Tool Basics

Types of Machines stamp

This is it, the first lesson in Scoot Stitches Sewing School. We’re happy you’re here and we hope you enjoy the lesson! YOU CAN DO IT! Let’s get started…

Aside from a few shakes of the tripod and a lovely view of my shoulder (sorry about that, I ran out of time to re-film), I think this went swimmingly! Please let me know if you think so too. Get to practicing and let me know if you have questions. Tweet us, Facebook us, or email me at scootadoot@gmail.com. Thanks again for watching. See you next time! #scootstitches

ScootStitchesLogo2

Announcing Scoot Stitches Sewing School

We are super-duper qua-triple excited to announce a brand new feature on the blog!

ScootStitchesLogo2

That’s right! Next month, we’re launching an ongoing series of sewing tutorials with a focus on equipment, basic sewing skills/techniques, and making running costumes.  Some installments will be in video, some will be text posts with photos, some may even end up on Periscope!

The best part is we REALLY want to hear from you! Have you seen costumes on Facebook and wished you could be that crafty? Did you inherit a sewing machine and wish you could use it but don’t know where to start? We can help! Tweet, Facebook, or Instagram your questions and requests with hashtag #ScootStitches and we’ll cover it for you in the series.

It doesn’t matter if you’ve never sewn a button or if you’ve made your own tent (kidding, only my amazing mom has done that), you’ll learn something from us Chicks. We’ve got over sixty years of combined needle-wielding experience here.

I promise you that you can make anything you’ve seen us make on this blog. We’ll teach you how. You CAN do it!

The first lesson will post 5/11 and cover sewing machine info like what all the knobs and settings do, basic care and feeding, and how to thread the darn thing.

In the meantime, check out our past tutorial on how to make a running skirt with a waistband pocket.

Don’t be shy, send us your questions and requests on Facebook, Twitter, and Instagram using #ScootStitches. We love emails and comments in our posts (below), too!

Show ‘Em Your Rack, A Tutorial

A while back, I posted about my plan to make a medal rack and share it with you, and this weekend, the planets finally aligned to allow me the time to get my craft on. Of course, there are a few things that always make DIY projects better.

Things like a snowy morning.

snow

And Colin Firth as Mr. Darcy.

It is a truth universally acknowledged that Colin Firth IS Mr. Darcy.

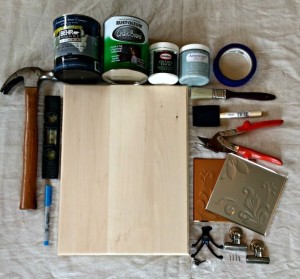
So, now that we’re all in agreement on that, let’s proceed, shall we? Here’s what you’ll need for this project:

supplies

Supplies:                                                                                                                                                                                   

Wood plaque of your choice                                            Chalkboard Paint                                                        Magnetic Clips

Primer                                                                                       2 Coat Hooks                                                                 Aluminum or Tin Strip

Paint Tinted color of your Choice                                Picture Frame Hook and Nails

Tools:________________________________________________________________________

Hammer                                                                                  Ruler                                                                              Level

Pencil                                                                                       Marker                                                                           Sandpaper or Sanding Block

Drill  or Screwdrivers                                                       Painter’s Tape                                                             Bristle Paintbrush

Foam Tip Paint Brush                                                      Fine Tipped Paint Brush for Touching Up

______________________________________________________________________________________

Step 1: Using a fine grit sandpaper or sanding block, lightly sand any rough areas on your wood piece. Pay attention to edges and corner in particular.

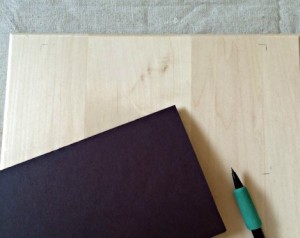
Step 2: Using a piece of paper, make a template for your chalkboard area to help you decide where you want it on your plaque. Once you have decided on placement, mark the corners with a pencil.

Step 2

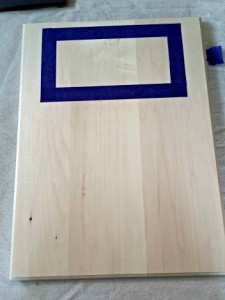
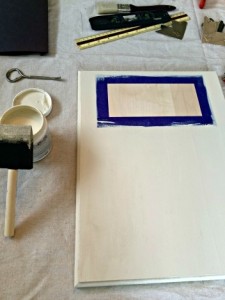
Step 3: Using a ruler and pencil, outline the desired area. Make sure your lines are straight and centered. Tape off the inside of your area with painters tape. Later you will paint the inside of your rectangle with chalkboard paint.

step3

Step 4: Paint your plaque with primer. Be careful not to get any in the taped off area. Let dry.

step4

Step 5: Paint over the primer with your tinted paint. Let dry.

step5

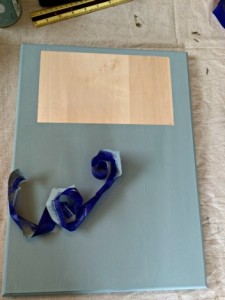
Step 6: Paint a second coat of your colored paint. Once it’s dry, remove the painter’s tape.

step6

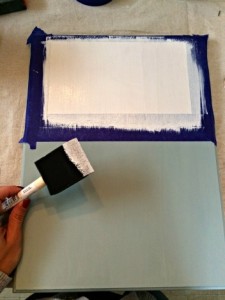
Step 7: Tape off the painted area around your chalkboard area. Paint the bare wood with two coats of primer. Allow each coat to dry thoroughly, and sand lightly between coats. This will help ensure a smoother writing surface once the chalkboard paint is applied.

step7b

Step 8: Apply two coats or chalkboard paint, allowing each coat to dry completely between coats.

chalk1

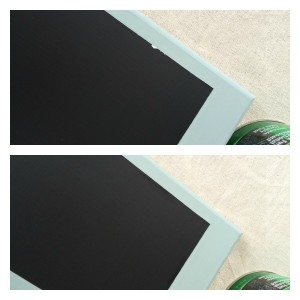
Step 9: After the chalkboard paint is dry, remove the tape. Touch up any areas with a small tipped paint brush if needed.

chalktouchup3

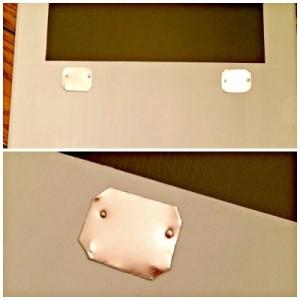
Step 10: Affix the tin strip (or pieces, as the case may be). Decide where you want your bibs to hang, and using a pencil, outline the strip. Nail in place. I had some tin tiles laying around my house, and used tin snips to cut them to the desired shape and size.

tin Collage

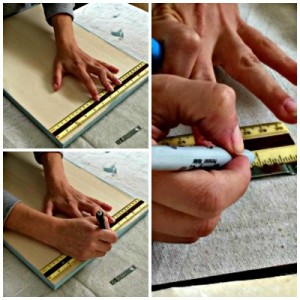
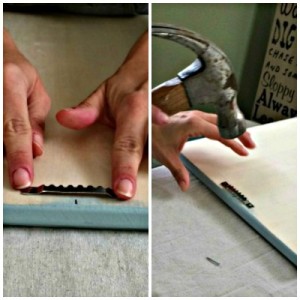
Step 11: Affix the picture frame hanger on the back. First, find the center of your plaque and mark it with a pencil. Then, find the center of the hanger and mark it with a marker. Next, align the two marks and nail your hanger to your plaque.

hanger collage

Hanger Collage 2

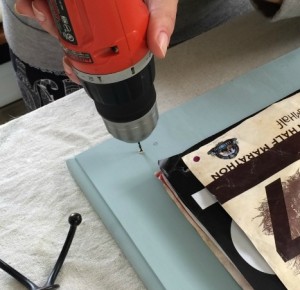
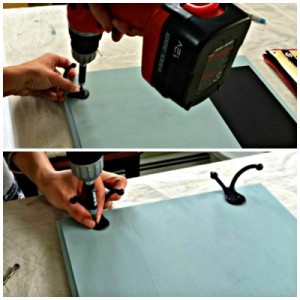
Step 12: Affix your medal hooks. Decide where you want them to go, and mark the screw holes with a pencil. It’s easier to start the holes using a drill and a bit. Using the hardware that came with your hooks, attach them to your plaque.

hooks

hook Collage

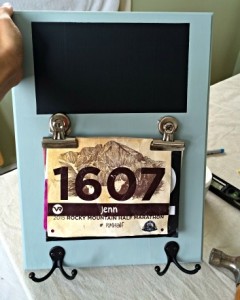
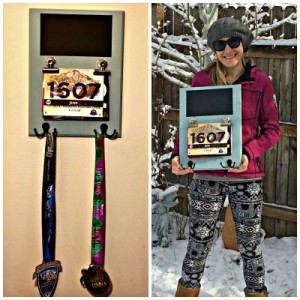
Step 13: Celebrate because YOU ARE DONE. And you rock! All that is left to do is hang your new medal rack. Then, attach your bibs to the clips and hang your bling from the hooks. Look how awesome you are!

I had my magnetic clips a little crooked in this shot, but you get the idea.

I had my magnetic clips a little crooked in this shot, but you get the idea.

finished Collage


I am loving how this project turned out. Now, I just need more medals to hang from it!

How do you display your medals? Have you made your own rack, or anything else, for that matter? Tell me all about it in the comments!