Recipe Box: Foodball Edition

When I sat down to write today, I really wanted to follow up on Jenn’s post about the Broncos and share my love of football too… but since I haven’t run a race in many months, I needed a different angle.

Enter food.

Of course.

Now that football season is in full swing and fantasy teams have been drafted, every Sunday at my house has become Foodball day. Clay and I spend Sunday mornings cooking and preparing snacks for the nearly ten people that pile on our couch starting at 1:00 to binge on beer, chili, chips and sports. (To be fair, I usually get a workout in on Sunday morning, so that the laziness of the rest of the day doesn’t catch up to me.)

foodball

He’s a Browns fan, but he humors me and cheers for the Packers, too.

The menu typically includes Clay’s Turkey Chili (which has no recipe… otherwise I’d share that with you today), Buffalo Chicken, guac, chips, some kind of dessert (last week I made Cleveland Brownies… get it?), pizza and other snacks. It ends up being quite a spread, but you need that kind of sustenance for 8+ hours of football viewing.

The chili is always a hit, but the sleeper favorite is the Buffalo Chicken. This shredded crockpot dish is a regular in our house because it’s so so so easy to make, and can be used in a lot of different ways. We like to put the shredded chicken on pizza, over salads, on a bun, in a wrap, or even eat it plain.

All you need is:

  • Boneless, skinless chicken breasts (3-4)
  • Your favorite Buffalo sauce (we’ve used Frank’s and Wegmans brands and love both)
  • Ranch seasoning packet
  • Your crockpot. Duh.

Since we usually prepare our Buffalo Chicken for meal prep or parties, we typically use 4-5 chicken breasts, though you can just do 2-3. We usually go through a whole bottle of Buffalo sauce and a complete seasoning packet, but if you use less chicken, you just need enough sauce to coat and cover it a little. The seasoning can be cut in half, too.

Place your chicken boobs in the crock pot, cover with Buffalo sauce and Ranch seasoning, and cook on high for 4-6 hours, or on low for 6-8 hours. You can start checking it after about 4 hours to see if it’s cooked through and ready to shred. I shred it in the crock pot so the chicken can soak up more of the Buffalo sauce, and then I keep it on warm when we’re serving to a group. If it’s for meal prep, I’ll shred it, leave it to cool down a bit in the crockpot and then move it to tupperware and the fridge.

Serve with tortilla chips, rolls, wraps or on pizza!

What’s your favorite tailgating or football food?

Wedding Wellness Wednesday

You guys, I’m so sorry for all of the wedding-related things that have been falling out of my mouth (fingers? I don’t know. Whatever.) lately. This is supposed to be a fitness-ish blog, and I feel like I can only write so many posts about how I’m “going to the gym and lifting heavy things” every day. That probably gets boring.

Because I know I get bored doing it.

image1

But, it’s necessary for a lot of reasons. 

  1. Working out keeps me healthy. Duh.
  2. Working out keeps me in a good headspace – I feel better about myself when I’ve gone to the gym or gotten a good sweaty dance sesh in.
  3. I have to wear a fancy dress in 8 months and apparently there will be a lot of pictures taken of me in said dress and I really would like to look and feel good in those pictures.

So, for this week, you’re getting another #weddingwednesday post, but it’s also going to be a #wellnesswednesday post. HA! It counts.

Eight months feels like a long time, but it’s really not. Especially when you consider the fact that those eight months include: Thanksgiving (FOOD), Christmas (COOKIES), and my busiest time of the year at work, leading up to our annual conference. Stress and food. Lots of food. That eight months kind of feels like a lot of time to do a lot of nutritional damage and not a lot of time to fix it.

My goals? Not inflict so much of the damage, and really dial in my fitness so that the “damage” I do isn’t really damage at all.

IMG_2753

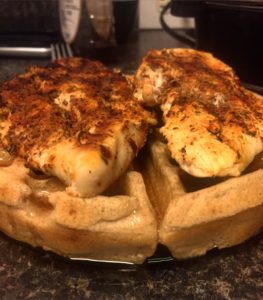
(grilled) chicken and (protein) waffles is totally healthy, right?

What does that mean?

For me, this means restructuring my workout schedule. In the past, I’ve written about having a pretty set lifting cycle, but the last couple of months have been a little more freeform. Clay and I were working out together a lot and we’d lift regularly, but during the summer, his work schedule gets pretty brutal, so I’ve been on my own, which has meant more flexibility in what I choose to do. It’s also meant I’ve lacked some of my motivation. Not having a gym buddy can be a bummer on the days that you’re just dragging and don’t want to go.

Now that Clay’s work schedule has calmed down a bit, we’re going to be getting back in our routine. I’ve found that in the last few months the balance of strength and cardio has been working well for me, so we’ll be keeping that as a basic blueprint, and adjusting our set/rep counts on strength days to achieve our individual goals. He wants to bulk up a bit and I want to cut body fat. I know that’s a totally vain reason, but hey, I’m being honest.

Go buy this right meow – so many good recipes, so easy, and its current 46% off on Amazon!

Having him around more regularly will also make our meal prep and planning easier, which I’m super excited about. I’m looking for new recipes to make and fit into our dinner rotation. I just picked up Juli Bauer’s Paleo Cookbook and I’m super excited to make more things from it. Her blog, PaleOMG, is also a regular go-to for me for just about everythang. Recipes, workouts, fashion… this girl is hilarious and awesome.

I got distracted. ANYWAYS. Having a concrete reason and deadline to meet a goal makes working on that goal way more fun and makes finding the motivation a lot easier. I know that I’m already 75% of the way there, I just have to get that last 25% moving and shaking.

What are some of your motivational hurdles? What fitness goals are you working towards?

DIY Wedding: Cakes!

This time last year, I was blogging a lot about marathon training. And running. And lifting.

This year? There’s almost no running to speak of. I don’t have a race to train for and I’m enjoying finding all of the other ways my body can work – and trying to maintain a balance between work and extracurriculars and life.

I’m also knee-deep in wedding planning, which is proving to be a whole other adventure, let me tell you. A fun adventure, but definitely an adventure.

Because my fiance and I are trying to keep or wedding simple and small, and because we’re working with a very modest budget, we’ve decided to DIY a lot of it. Flowers, music, booze, desert, maybe even my dress. Fortunately, having a small wedding means that coordinating all of this won’t be terribly outrageous.

The thing I’m the most excited about DIY-ing though? The cake! I love to bake and while I had never made a wedding cake before, I felt pretty confident in my ability to figure it out. I’m no professional by a long shot, and I’m not even that well-versed in decorating, but I am preeeetttyyy good at following instructions and my Pinterest project success rate is super high.

In addition to baking a lot of cookies and bars and other treats, my primary preparation for this project has been to watch way too much of The Great British Baking Show (which is arguably the best show on television, and if you’re not watching it, what’s wrong with you?).

So, two weeks ago, while home alone for the weekend and having the kitchen to myself, I decided to get started. This is how much cake baking I haven’t done in recent years: I didn’t even own a cake pan. I went out and secured a couple cake pans and got to work.

So. Much. Butter. In. Here.

So. Much. Butter. In. Here.

This batter is so light and fluffy and YUM.

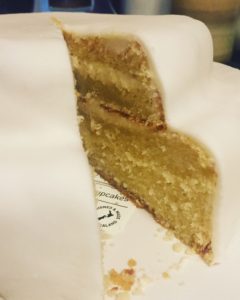
I started with a simple vanilla butter cake recipe, but I didn’t have the called-for cake flour, so I just forged ahead with AP flour and kept working. I also thought to myself “hey self, you’ve never tried to make fondant before, why not try now, since you have all of the ingredients.” I wish I’d thought to take pictures of THAT hot mess, because whoa. The mess was real. Melted marshmallows and powdered sugar literally everywhere in my kitchen. And then I threw together some vanilla buttercream frosting. The end result didn’t turn out half bad.

IMG_2878

The cake was slightly underbaked and a little bit more dense (thanks, AP flour), but the taste was great and everyone in my office who got to taste test enjoyed it.

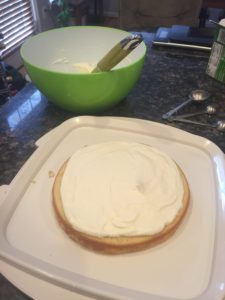
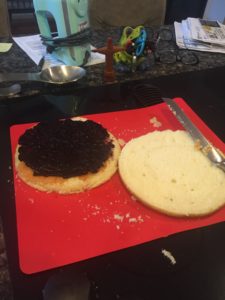
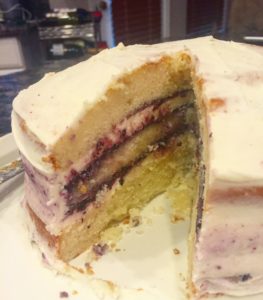
For our second trial, I decided to play with flavors and still not worry too much about decorating or overall aesthetics. This time, I opted for some blueberry jam as the filling along with almond buttercream. No fondant this time and to keep it simple, I just did one size cake.

IMG_2914

I had actual cake flour this time around, so the crumb of this bake was a little looser, but the taste was just as good and stayed just as moist. The almond buttercream was a big hit and Clay (who famously doesn’t like cake) asked for an even bigger slice than the test one I gave him. He thought that there could be more blueberry – I tend to agree.

As the wedding gets closer, there will be more test bakes with a few more flavors and a greater attempt at decorating. Ultimately, I want a naked or semi-naked cake, so I’ll be working mostly with fruits and flowers to decorate. I’m still looking for other cake recipes, so if anyone has any reliable ones, I’d love to try them!

Recipe box: Peanut Butter Energy Bites

I’m all about the protein lately.

Cottage cheese, edamame, peanut butter and piles of grilled fish. I’m sure the bean in my belly has something to do with it.

So when I was in full nesting mode last week, I started whipping goodies up in the kitchen. Banana bread, roasted potatoes, baked chicken, pasta fagiole.

Then a peanut butter-looking concoction popped up in one of my social media feeds. I realized I had all the ingredients and set to work to make PEANUT BUTTER ENERGY BITES!
https://www.instagram.com/p/BJGcWSNDG1Q/

All lined up in a row.

Ready to try this super easy recipe? Here is what you will need:

  • 2/3 cup creamy peanut butter
  • 1 cup old-fashioned oats
  • 1 1/2  Tbsp. honey
  • 1/4 cup mini dark chocolate chips
  • 1/4 cup chia seeds (I used ground chia)

Mix all ingredients together in a bowl. Cover, let chill in fridge for 30(ish) minutes.

Grab a handful of oats and a few chocolate chips and scatter them on a clean cutting board. Roll the chilled mixture into bite-sized balls, then roll over the cutting board for another layer of oats and chips.  My batch made 20 teaspoon-sized bites.

Store the completed energy bites in an airtight container in your fridge. ENJOY!

Even my brutally honest husband liked these. I’ll be making them more often for sure.

What’s your go-to protein snack?


Cotopaxi’s Journey to Good Health: Good Eats

I love food. Like, a lot. I love food so much, this is the second food-related post you’re getting from me this week!

But my focus this week is prompted in part by Cotopaxi, a company dedicated to making a positive impact on the world. Our friends there shared their mission:

At Cotopaxi, we’re all about encouraging people to get out, stay active, and do something good everyday. Giving is a huge portion of who we are, and as a Benefits Corporation, our hiking backpacks tend to be the most popular and create a big impact. We donate a percentage of every sale to various organizations that support global health initiatives, which is why we’re excited for all ways that we can promote better livelihood!

That’s totally rad, if you ask me! Not only providing equipment and promoting healthy living, but giving a portion of those proceeds to help fund initiatives dedicated to global health? Yeah, that’s a cause I can get behind.

When Cotopaxi contacted us, they also provided this cool infographic, highlighting ways to live a healthy lifestyle. I’m going to break it down over the next few weeks and share with you my favorite ways to do each of these things.

Cotopaxi_IMDM_v03@2x (1)

This week? I start with Energy.

I talk a lot about healthy eating and meal planning and making sure I’m eating the right food to fuel my workouts. One of my favorite tips they offer is “focus on adding nutritious foods rather than eliminating food groups and specific foods.” Can I get an amen?! That’s probably one of the hardest things for people to understand, especially in a society that has been completely inundated with fad diets and nutrition styles. I mean, if you’re going to eliminate something from your diet, getting rid of soda and highly processed foods isn’t the worst plan, but entirely cutting out carbs? NONSENSE.

Carbs are fuel, guys! Your body needs them if you want to feel good and perform well. The same can be said for proteins and fats. And making sure you get lots of veggies in during the day? Yeah, that’s another awesome tip. Veggies are so delicious – and I’m always working on making sure I’m getting enough.

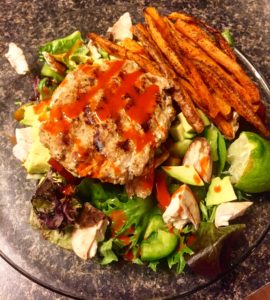
Homemade Turkey Burger on a bed of mixed greens and advocado. Mmmm.

Homemade Turkey Burger on a bed of mixed greens and avocado. Mmmm.

I typically work out 5-6 days a week, and my workouts are usually made up of a healthy mix of cardio and strength – and I usually go to the gym after work, before dinner. Consequently, if I don’t have a snack beforehand, I’m usually starving and have a crummy workout. I like to have something small before I head out just to make sure I’ve got the energy to work hard and feel good.

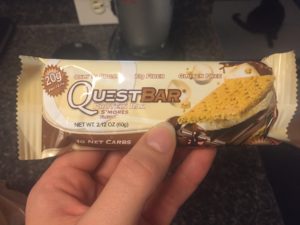
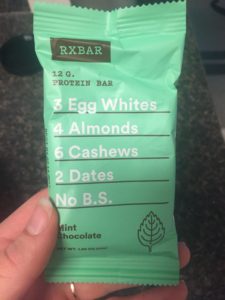
Some of my favorite things to snack on? There’s a variety! Lately, it’s been a Quest protein bar, an Rx Bar or a handful of trail mix. I try to find something that doesn’t have a ton of sugar and doesn’t make me feel too full – having an upset stomach during a heavy training day is no bueno friends. Sled pushes will turn into pukies otherwise.

Quest Bars are heavy on protein and light on sugar!

Quest Bars are heavy on protein and light on sugar!

Rx bars are great because of their simple ingredient list!

Rx bars are great because of their simple ingredient list!

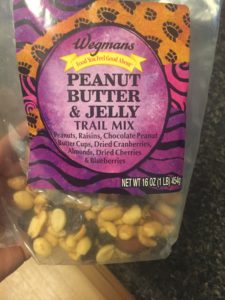
To be fair, this trail mix is kind of candy...

To be fair, this trail mix is kind of candy…

These snacks are easy to keep on hand – I have some stashed in the pantry and at least one protein bar in my car all the time, just to make sure I’ve got fuel when I need it. My philosophy? Put good in and you’ll get good out. Fuel your body with good, healthy, well-balanced food and your body will reward you with solid performances in the gym, on a run, on a hike and in life!

Stay tuned next week for a fun yoga adventure, featuring my fiance, who has never really done any yoga before! #tryallthethings

Recipe Box: Crock Pot Hawaiian Pork

I’ve written before about the importance meal prep plays in my life: it makes eating healthy very easy, and packing lunches in the morning for work is a cinch when all I have to do is grab a pre-made Tupperware on my way out the door.

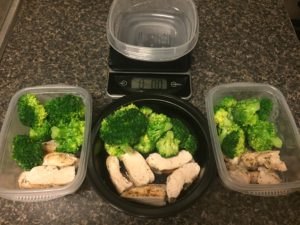
My fiance and I have been pretty diligent for the last few months about prepping our lunches for the week on Sunday nights. For a long time, we were doing grilled chicken and broccoli. Let me tell you, though. After about three months of essentially the same lunch, every work day, chicken is kind of the last thing you want to eat. Not to mention the fact that grilling what amounts to about eight chicken breasts in one night and prepping them for lunches is really time-consuming.

Mmmm. Chicken. And Broccoli.

Mmmm. Chicken. And broccoli.

We are not about that life anymore. Or right now, at least.

And then, two weeks ago, we remembered that we have a crock pot and that it’s a life saver. We planned a recipe for the week that would not only not be chicken, but also be able to be thrown in the crock pot, and left alone for seven hours, so we could run errands and enjoy couch time without having to spend a chunk of our Sunday cooking.

Since we didn’t want chicken again, I suggested looking at alternative options at Costco – which, if you didn’t know, is one of the best stores on the planet. We ended up finding a huge pork loin (that could be halved, and frozen, and last us two weeks!) We got home, got to brainstorming, and put together this tasty recipe:

Ingredients:
3lb pork tenderloin (or whatever you have)

1 pineapple, chunked and thrown in the food processor until pureed

Teriyaki sauce, to taste

1 tsp-ish ginger

1 Tbsp-ish honey

Instructions:

Put tenderloin in crock pot – make sure it fits nicely, cut in half if needed. Peel pineapple, and cut into chunks. You can either leave your pineapple like this if you want big pieces in the final product, or you can use your food processor to puree it – I like this option better because it releases more of the juice. Cover pork in pineapple puree, add teriyaki, honey and ginger. You’ll notice that none of these measurements are accurate, because we don’t really measure – we eyeball. Oops. If you’d like, you can also add a little bit of BBQ sauce, too. I usually top my lunches with a little bit, too.

Cook for 6-8 hours, or until the meat falls apart.

That’s it! Super easy, super tasty, and a definite improvement over chicken and broccoli for months on end.

What are your favorite summer crock pot recipes? 

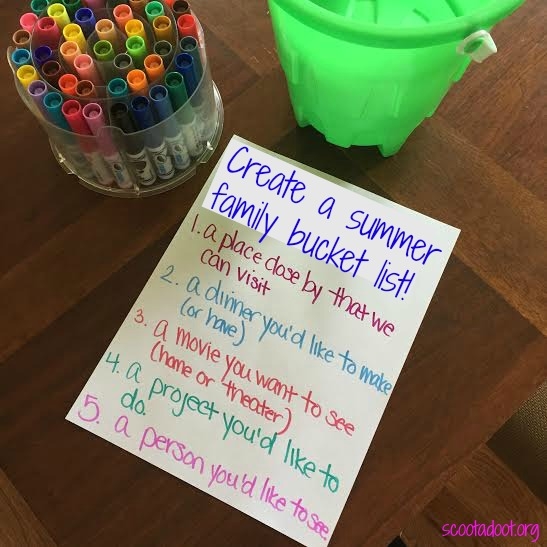
Tuesdays with Meri: Summer Family Bucket List

familybucketlist

Ah, summertime.

For those of you who don’t know, I’m mostly at “SAHM” – stay at home mom. I say mostly because I have a couple of freelance jobs that I’m lucky enough to really enjoy from my own home/on my own time schedule.

As a stay at home mom, I get to do a lot of what I want during school days while my kids are off learning and preparing to take over the world with brilliant ideas fostered by their teachers. But during the summer, they are mine all mine!

Quite frankly, I don’t want their brains to rot over the summer. It would be oh-so-easy to let them fall into video games, tv shows, and the like. They are at the age where they would quietly do so and I’d be happy because hey, it’s quiet.

BUT NO! We need activities! We need thinking! We need creativity!

The last day of school was last Wednesday.

finishline

After racing across the school to summer finish line, they came into the house to find our summer bucket list waiting. And what does every bucket list need? A bucket, of course.

I brainstormed with retired Chick, Bec, about what should be on our list to guide them in their picks. I wanted them to be fun but also achievable and not too far out in left field.

bucketlistbrainstorm

Their picks were creative and thankfully, every single one is something that we can do sometimes over this summer. No saying no!

Of course, now that we’ve written them down, they want to do all of them. Immediately. But that’s not what the summer bucket list is about. It’s about spreading the ideas out over the summer and being engaged throughout the long hot months.

gardenharris

But some are meant to happen right away!

My older son requested for his project that we make a garden (which also fits in nicely with a Boy Scout requirement) and my younger son requested to see his 1st grade teachers, Mrs. Tees and Ms. Harris over the summer. They are two of his our most favorite human beings.

Now, if you aren’t from my immediate circle of friends, you probably don’t know this; These two requests actually go hand in hand.

msharris

Ms. Sonya Harris was a driving force behind the Bullock Children’s Garden and we’ve spent a good majority in the garden at my son’s school since its inception. She is our garden guru and also an amazing friend to our family. Two days after the end of school, she was at our doorstep, ready to visit with us and discuss our home garden!

(Never fret, Mrs. Tees will be making her appearance later on this summer!)

After Gabe got over the fact that HIS TEACHER WAS STANDING IN HIS HOUSE, he gave her the grand tour. We’ve only been in our new house a little over a month but we’ve discovered the new yard has a welcome surprise!

An added bonus - we already have a mint patch in our yard from the previous owners!

We have a mint patch in our yard from the previous owners!

Our flower beds are perfect for planting and we have a lot of yard space for our garden. One of the things that Sonya was quick to point out is that while gardens need tending they are also a lot easier than many people imagine.

fronthouse1

Since she IS a our teacher/friend, it only made sense that she assign us homework. There was no groaning after she said the word, either! She asked each of them to make a list of what they would like to plant in our garden.

This summer is going to be absolutely awesome and I know that the home garden will play a large part in our planning and activities! As we go along, I’ll be sure to keep you all posted on our plans as well as other events that come to fruition thanks to our bucket list.

Check out this awesome video from last summer in our community garden and you’ll see a couple of familiar faces!

What do you have on your summer bucket list? Have you planted a garden? What do you think we should we plant in our garden?

Recipe Box: Healthy Sesame Chicken with Broccoli

The past month and a half has consisted of takeout food for me and mine. Sad, but true. With moving house and getting settled, it’s been less about being healthy and more about just getting things done.

However, now that we are finally getting things in order, it’s back to cooking nightly. Which is great because it makes our house feel more like home.

I found this Healthy Sesame Chicken with Broccoli recipe on Feed Me Phoebe last year while doing the Advocare 24 day Challenge. It’s become a standby for our family and it’s pretty awesome because it’s fake-out food. Meaning it tastes like take-out but it’s not!

Huzzah! Cheaper, healthier, and absolutely delicious.

sesamechickenbroccoli

You ready for this?

Grab your ingredients!

Ones I usually have to buy at the store each time are:

  • 2 cups broccoli florets
  • 1 pound boneless skinless chicken breast, cubed
  • 1 red pepper, seeded and dice
  • 2 scallions, white and green parts separated, thinly sliced (I don’t usually use the green parts, tbh, but you can do as you wish)

Things I usually have on hand in the house unless I’ve run out:

  • 1 large egg white
  • 2 tablespoons cornstarch
  • 1/2 teaspoon sea salt
  • 1 tablespoon vegetable or coconut oil
  • 1 garlic clove, minced (I always “cheat” with a jar of minced garlic in the fridge)
  • 3 tablespoons gluten-free tamari
  • 1 teaspoon sesame oil
  • 3 tablespoons honey
  • 2 tablespoons sesame seeds (black or regular)
  • rice

Okay, so I always, without fail forget to get the rice going before the food and then about 2/3rds of the way through I’m throwing out curse words (quietly, because children) and rushing around to get the rice on the stove. So I’m going to put it right up here on the top. If you want to serve this WITH RICE, go on and get that going.

pepperandscallions

I always also forget to read ahead with recipes. My bad! Therefore, my suggestion to you is this: cut up your ingredients beforehand. That means cube the chicken. Clean and chop your pepper. Take care of the scallions. Get all the little things out of the way ahead of time so you can just toss things into your skillet and cook when the time comes.

In a large skillet, cover the broccoli florets with 2 cups of water. Simmer over high heat. Cover and then cook for a few minutes. Drain in a colander. Rinse and dry skillet.

Whisk the egg white, cornstarch, and salt in a mixing bowl. Add the chicken and coat.

This was around the time that I realized I had forgotten the rice.

This was around the time that I realized I had forgotten the rice.

Heat a splash of the vegetable or coconut oil in the same skillet and cook the chicken, about 2-4 minutes on both sides. Transfer to a clean bowl and set aside.

Add another splash of the vegetable or coconut oil in the skillet and stir fry your peppers and white scallions until lightly charred. Stir in the garlic and mix until fragrant. Add the chicken back into the skillet along with the tamari, sesame oil, honey, and sesame seeds. Simmer until the sauce thickens, about 2 minutes.

Add in the broccoli and green scallions (if you’re going that route) and mix.

Serve over rice and chow down!

finishedproductchickenandbrocc

It is amazing! Tonight I’m making another favorite here in my house, Skinnytaste Mongolian beef and broccoli, which is similarly amazing and has the same fake-out effect. Yes, please.

What’s on the menu at your house? Got a link? Share it with me, I’d love to check it out!

Camping: A How-To for Food

This weekend, we have plans. We’ll be spending the long weekend (and my birthday!) in the Shenandoah Mountains in Virginia. I’ve been looking forward to this camping trip for a couple of months and now that it’s finally upon us, it’s time to start deciding what foodstuffs we’re taking along.

IMG_2544

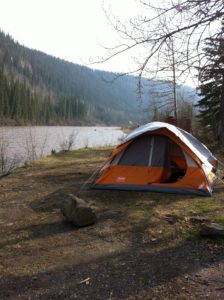
Okay, this is Alaska, but camping there is amazing, too. And isn’t this view incredible?!

Now, planning a menu for a weekend spent in the woods, sleeping in a tent, without a proper kitchen, can be a little daunting. But, thanks to years as a girl scout and parents who took us camping as kids all the time, the task of packing the foodz isn’t so bad.

(Really, we can chalk it up to my dad’s affinity for lists that has been passed down to me. Everything seems more manageable with a list .)

Getting started might be the hardest part, but here a few steps I take to make sure cover all my bases.

D211EAEF-1C30-407A-B3DF-4A966F6E6616What Are The Cooking Conditions?

I always start with this question, because knowing how I’m going to be able to cook my food usually determines what I can bring. This weekend, I’m tent camping, which means no camper or RV with a kitchen. We’ll either be cooking over the fire (dinners) or using my camp stove to boil water for breakfast, and packing lunches that don’t require heat (pb&j!). Knowing that I have a campfire with a  grate gives me lots of options – this weekend we’ll be using trusty pre-made (by me) foil packets. We’ll put salmon filets in some, and sliced potatoes, onions, garlic, etc. in the others. They turn out to be some of the tastiest meals ever. Yum!

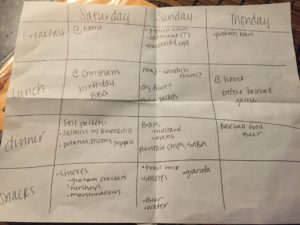
meal planHow Many Meals Do You Have to Prepare?

I find it really helpful when packing for a camping trip, to plan out each meal ahead of time, that way I know exactly how much food I need to pack. This weekend, we’ll be out two nights, so as you can see from the above grid, I’ve planned out our days by food. This plan will be my grocery list for tonight and my packing list for Saturday morning. I’ll just throw things in the cooler and we’ll be good to go!

scoot 2What Are Your Daily Activities?

Knowing what you’re planning to do each day you’re out can really help determine what food you should bring. Typically, when I camp, I like to be pretty active, so I know that the food I bring needs to sustain long periods of activity, but also be easy to throw in a day pack. We’ll be hiking for much of the day Sunday, so while breakfast and dinner will be had at the campsite, lunch and snacks will be on the trail. Protein bars, trail mix, granola, and pb&j sandwiches are all great options. They’re easy to pack, both in the car and in your day pack, they’re full of the protein and carbs to sustain a long day of activity, and they’re yummy!

scoot 3Be Bear Aware: Food Storage

One thing that’s important to consider every time you go camping: how am I going to store my food? Remember, you’re going to be in a wilderness area – you’re coming in to an animal’s home and just because you set up your tent and stake your claim to an area doesn’t mean that all of the critters will leave you alone. Growing up and camping in Alaska, I was taught to always be bear aware, and that included knowing how to store my food while in the woods. If you’re car camping, lock it up inside any time you’re not using it. If you’re tent camping, make sure you store your food in a bag, off the ground, away from your campsite – never in your tent! Flimsy walls will do nothing to keep a bear at bay.

IMG_1460 (1)Pack Out What You Pack In

Piggy-backing on the last point, the last key to a successful food venture in the woods is cleanup. Food waste and trash are notoriously smelly, and nothing attracts wild animals like the pungent aroma of last night’s dinner. Proper disposal of these items not only ensures that your campsite stays safe, but also guarantees that you’re doing your part to keep the wilderness clean, so that you and others can come back and enjoy it again. If you’re in a campground, there will be dumpsters for you to use – we usually take our trash out after dinner every night so it doesn’t sit in the car and stink things up. If you’re backpacking, you’ll need to pack out your garbage and dispose of it when you reach an appropriate garbage can.

Ultimately, camping is the funnest and cooking over a fire is one of my most favorite things. I’m looking forward to a weekend in the mountains, relaxing by the tent, hiking through the woods, and enjoying some s’mores by the fire – it’ll be a very happy birthday, indeed!

Recipe Box: Salted Caramel Cookie Bars

It’s been raining. For forever. Everything is wet and cold and terrible.

Consequently, I feel super unmotivated kind of all the time and basically hibernation seems like the best option.

I need summer, badly. I’m starting to feel like a slug.

So, to feel better, I bake. Last weekend was the last concert of my choir’s season and I volunteered to bring one of my favorite sweet treats: Salted Caramel Cookie Bars. I discovered this recipe last summer and it’s become one of my go-tos for birthdays and special occasions.

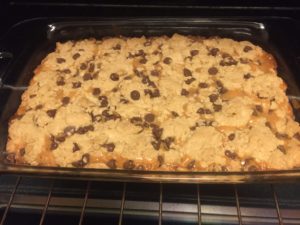
Let’s break it down really quick: layer of chocolate chip cookie dough, layer of salted caramel, layer of cookie dough.

emoji

These bars are ridiculous. On their own, the cookie bars would be delicious, but adding the layer of caramel is some next level ish. (And then, when you’re done with the bowl that you melted the caramel in, you can make whipped cream in it with your leftover heavy cream, and then your whole life will be magic. Because caramel flavored whipped cream.)

INGREDIENTS:
2 1/8 cups all-purpose flour
1/2 teaspoon salt
1/2 teaspoon baking soda
12 tablespoons butter, melted and cooled to room temperature
1 cup light brown sugar
1/2 cup granulated sugar
1 large egg
1 large egg yolk
2 teaspoons vanilla extract
2 cups chocolate chips
10 ounces caramel candy squares, unwrapped
3 tablespoons heavy cream
Sea salt, for sprinkling over caramel and bars
DIRECTIONS:
1. Preheat oven to 325 degrees F. Spray an 9×13 baking dish with nonstick cooking spray and set aside.

2. In a medium bowl, whisk together flour, salt, and baking soda. Set aside.

3. In the bowl of a stand mixer, mix the melted butter and sugars together until combined. Add the egg, egg yolk, and vanilla extract and mix until smooth. Slowly add the dry ingredients and mix on low, just until combined. Stir in the chocolate chips.

4. In a large microwave safe bowl, combine the caramels and heavy cream. Microwave caramels on High until caramels are melted, stirring every 20 seconds. This will take about 2 minutes, depending on your microwave.

5. Divide the cookie dough in half. Press half of the cookie dough into the prepared pan, smoothing the top with the spatula. Pour hot caramel over the cookie dough. Sprinkle caramel with sea salt. Drop spoonfuls of cookie dough over the caramel and spread dough with a spatula until the caramel is covered. Sprinkle the bars with additional sea salt.

6.Bake cookie bars for 30 minutes or until the top of the bars are light golden brown and the edges start to pull away from the pan. Cool bars on a wire rack to room temperature. Cut bars into squares and serve.